The MGA With An Attitude
|
| MGAguru.com |
|
MGAguru.com |
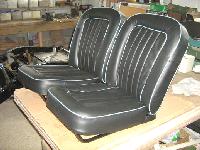
COMPETITION DE-LUXE SEATS for the MGA -- INT-114R
REBUILDING The C/D Seats
These photos and notes brought to you courtesy of David Adams.
Rebuilding Competition Deluxe Seats
This seat upholstery kit is from PJM, friendly service and a well made kit. Sandra is the helpful contact there.
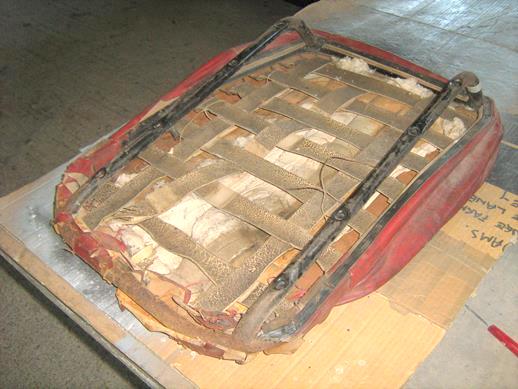
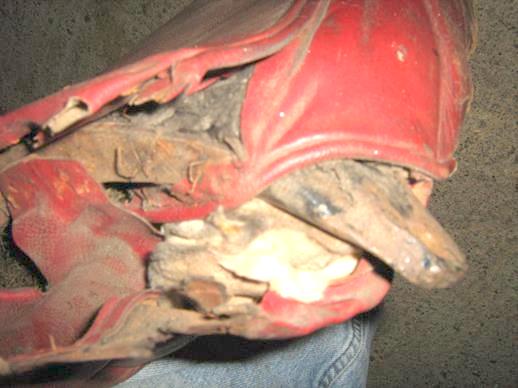
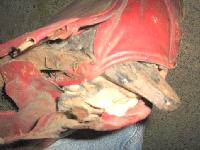
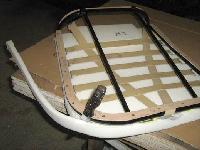
Strip off the old covering. Note from the remnants that contact adhesive has denatured the webbing, try to avoid contact adhesive on the webbing in the rebuild.

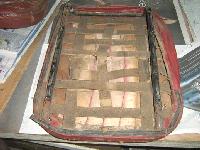

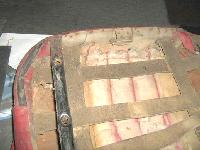

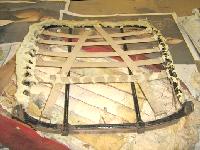
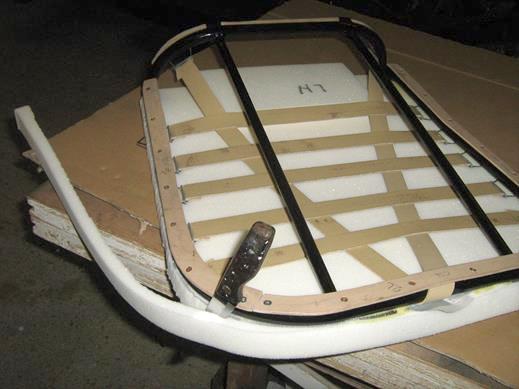
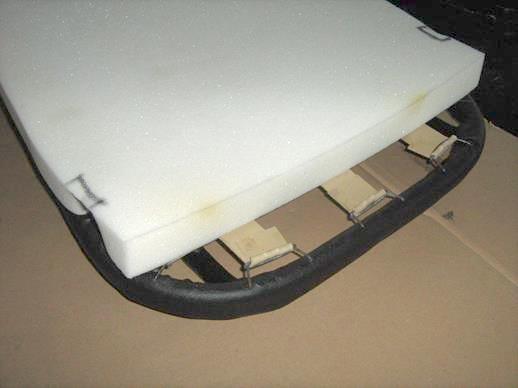
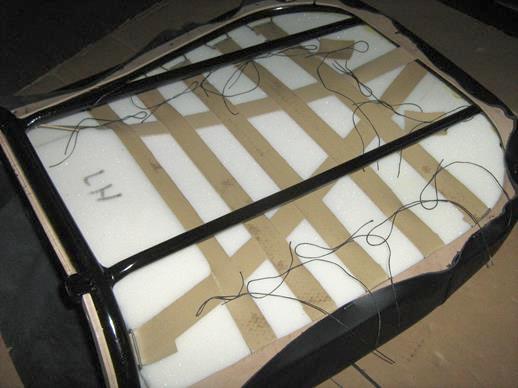
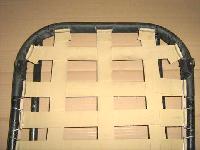
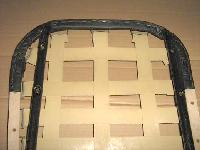
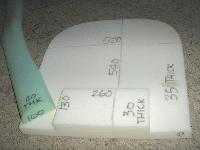
Plywood strips are screwed to the frames to provide a fixing for the upholstery. They are 1/8 thick except for the 3 pieces each at the rear of the seat and bottom of the back which are 1/4. One seat set is a mirror image of the other. They are mirror images and drawings are shown elsewhere on Barneys website.
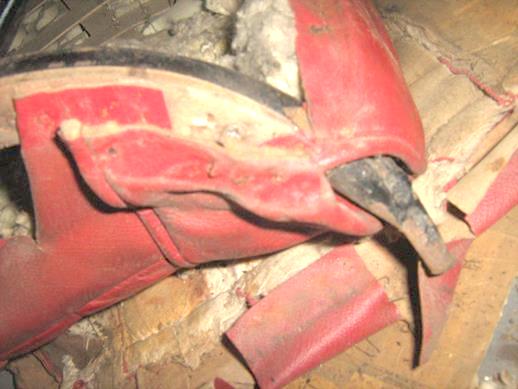
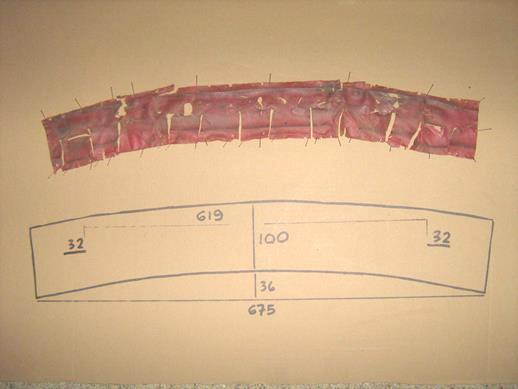
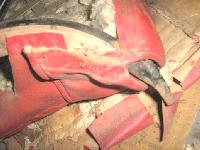
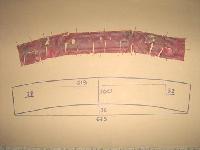
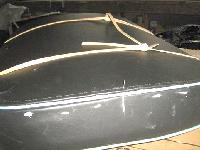
There was originally a covering on the rear frame of the seat which does not come with the upholstery kit. It must have been fitted after the webbing was in place because it has been lacerated to fit through the clips. It is much easier to put the covering on first and stab the holes for the clips with a scribe. The 619 dimension should be 519.

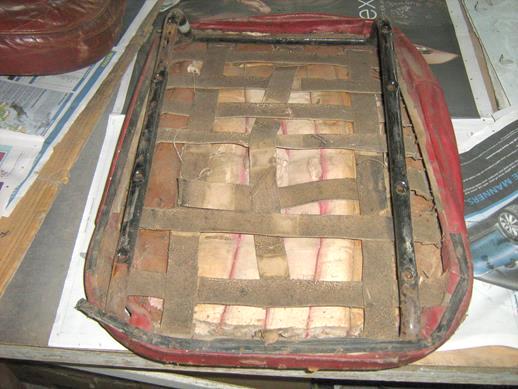
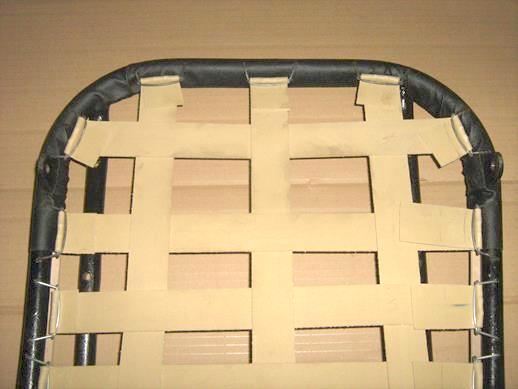
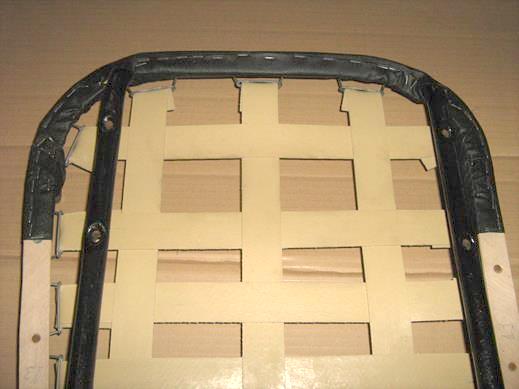
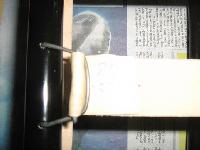
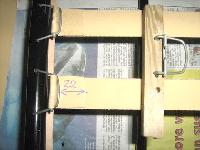
Webbing is 2 wide for the seat and 1-1/2 wide for the back, but 1-1/2 webbing is no longer available. Cut down the 2 webbing to suit. I bought 22 meters of 2 and cut off from the roll as I went along, with some left over.
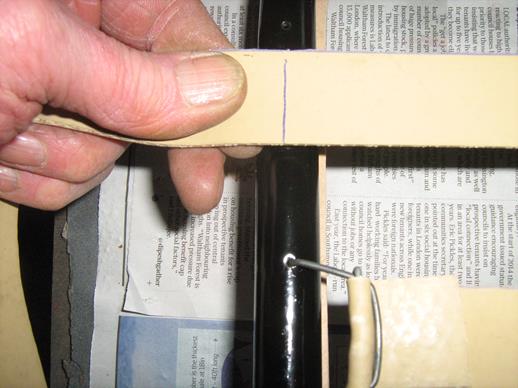
Insert the webbing into a clip and pull taut across the frame, mark the webbing on the center of the frame. Fit the other clip so that the mark is under the buckle, insert into the holes and cut off from the roll. Tighten to suit, typically 22mm. Sandra recommends to pull the webbing as tight as you can. It is easier to fit the buckle onto the clip if the legs are sprung into a wooden holder, as shown. The webbing is woven as shown in the pictures.

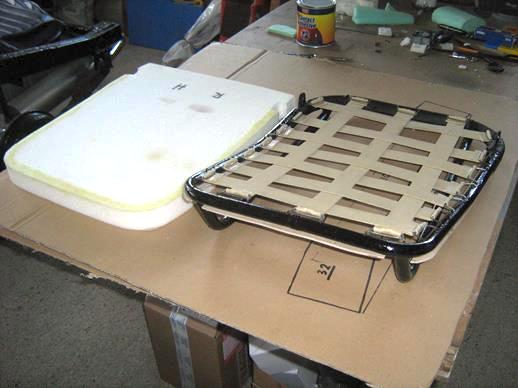
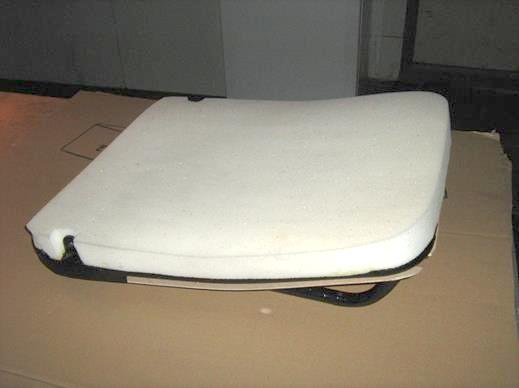
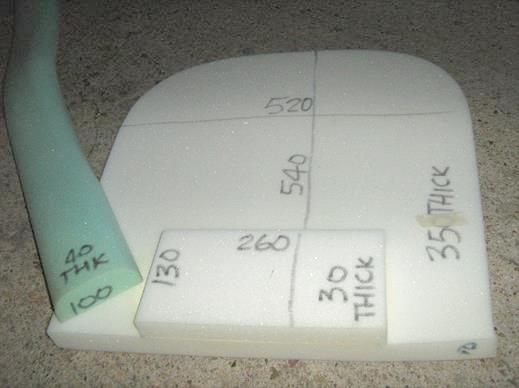
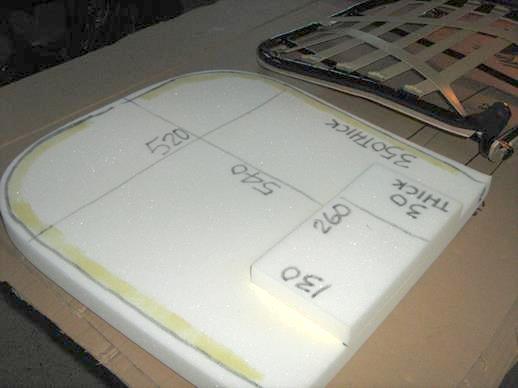
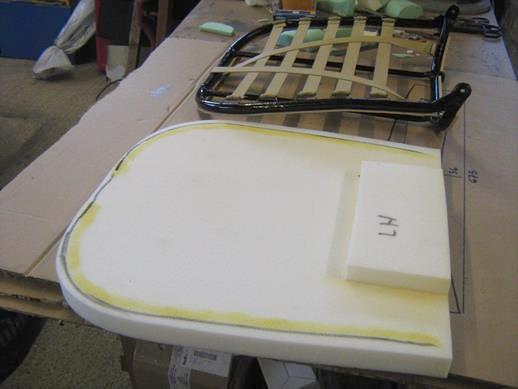
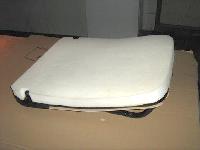
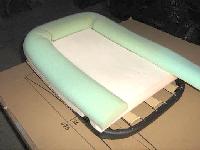
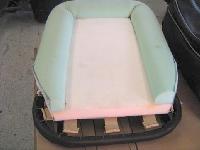
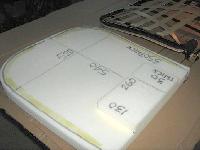
The seat foams are nothing like the original materials and comprise flat foam cushions with half round horseshoe edge trims. All supplied oversize. You may wonder why they cost so much and dimensions are shown later on if you want to save some money. It seems that the only variable is foam density and I suggest that this is dense foam.
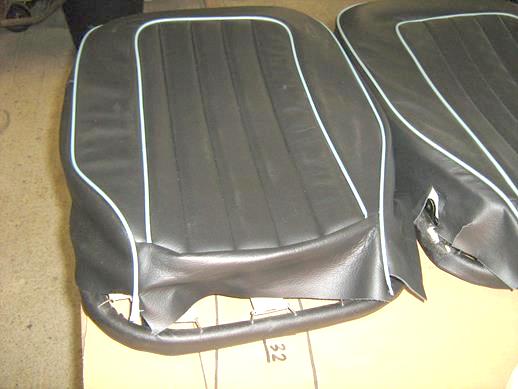
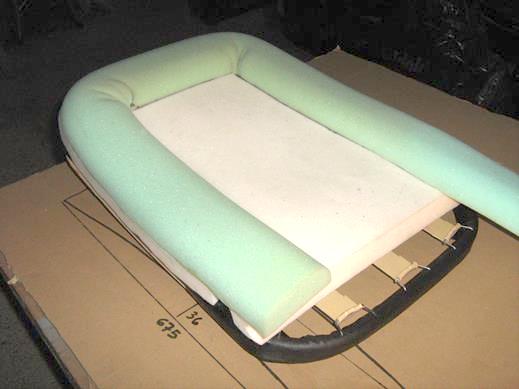
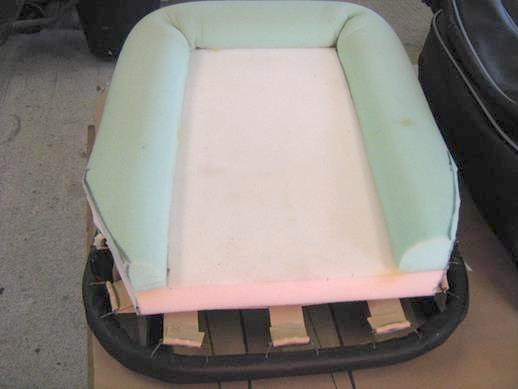
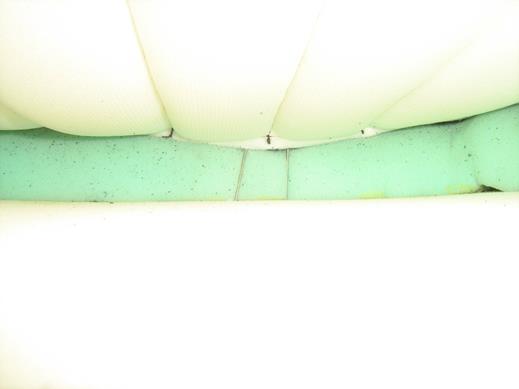
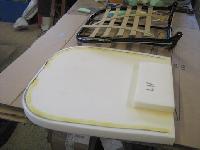
The cushions have to be stuck to the frames, but not the webbing, and then trimmed to the seat shape. The edge trims are stuck to the cushions and are puckered around the corners, not mitred. Stick one edge of one side and then the other edge, and then similarly on the other side. The seat back has a rectangular lumbar support to be stuck in place, as in the picture above.

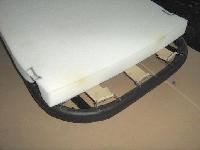

With the seat foam in position test the tension of the webbing. Put the seat, without slide rails onto a hard flat surface. Sit on it and try to slide a piece of 1/4 ply between the surface and the underside of the webbing. Tighten the webbing until the ply slides freely. Lay out the seat cover on the foam and mark and trim the foam to suit. Trim around the ears which connect to the seat back.
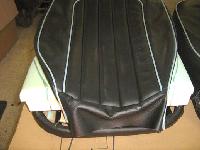

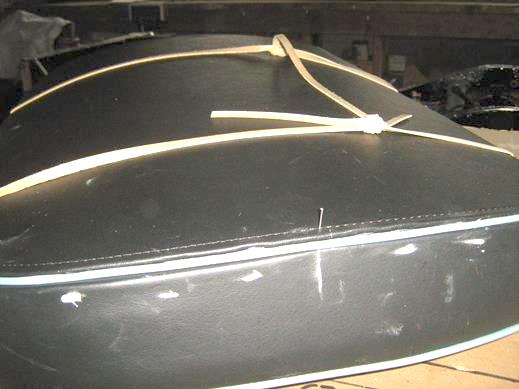
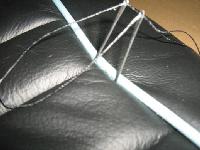
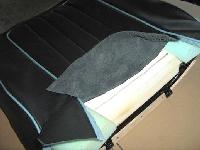
Offer the cover over the foam from the front and then around the sides. Pull to shape and tack with staples and adjust to get the best fit. Tack lightly. The cover will span over the edge foam and has to be pulled down over the inner edge of the horseshoe. The method is shown later on for the seat back and comprises stitching through the inner edge of the piping, at the seam, through the foam and tying off around the webbing. I made two 6 long needles from spring steel and used No 3 waxed polyester upholstery thread.
Two needles are used simultaneously with a loop of thread between them. The loop does not need to be as wide as the webbing and preferably 6 to 10mm so that the thread pulls down into the piping seam and is invisible, particularly on the corners. Leave the tying off as bows until all loops are done and permanent stapling is complete. In places, mainly the corners, where there is no webbing, small pieces of webbing can be used as spreaders to stop the thread cutting into the foam.
When the seat bottom is pulled down inside the horseshoes to your satisfaction remove the earlier staple tacks and staple all round. Then tie off the threads.
Repeat the same procedure for the seat backs.


For the seat back, trim the horseshoe foam so that the cover can reach the plywood fastening. Staple the edge of the leather to the ply.


The seat back panel has a double curvature. Use trimmings of the webbing to make temporary ties and use pins to locate the cover and adjust for the best fit.
Both the board in the back panel and the insert in the piping are much stiffer than the originals and it is a struggle to get the stapler between the board and the piping to make a firm fastening into the ply. Any puckering can be smoothed out later on.
Sandra says to be patient and take it slowly. I agree.
|