The MGA With An Attitude
|
| MGAguru.com |
|
MGAguru.com |
MGA SEATS REBUILD Tech Day - INT-110B
March 20, 2005 - Naperville, Illinois
Page 2 of 2 - Back to Page 1
Seat Backs (MGA Roadster) - Bottoms on page 1
Click on small images for larger images.- Larger pics average 30 KB.
 |
 |
 |
 |
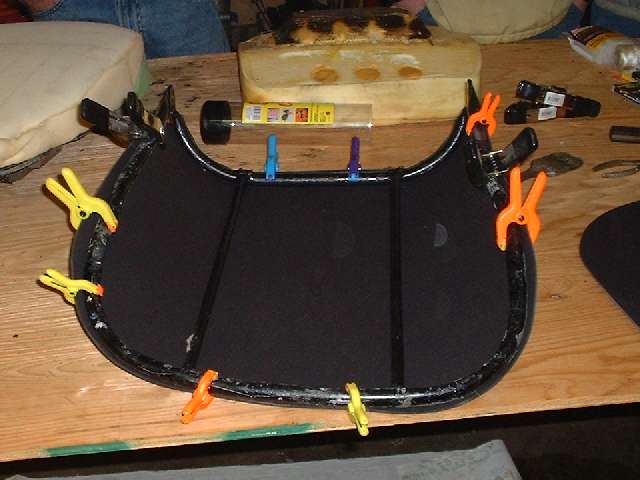
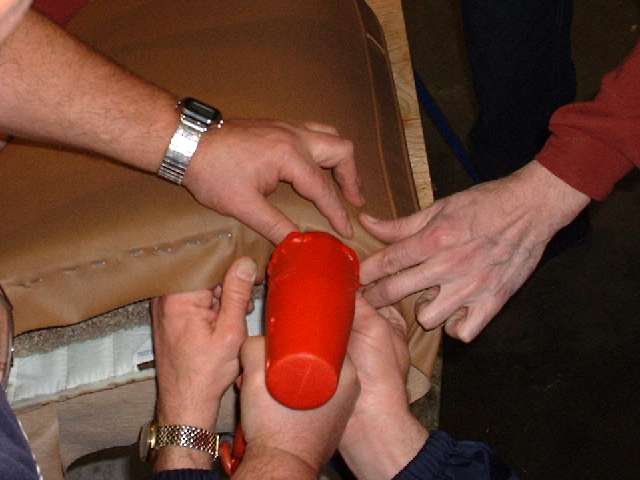
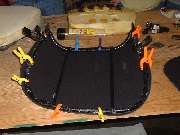
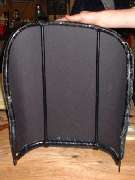
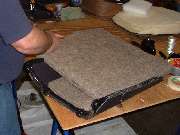
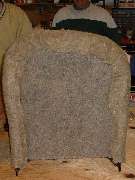
In planning for this job I picked up a box of 22 plastic spring clamps for a few bucks on the bargain table at the local Sears Hardware store. Russ brought along a few heavier spring clamps, and glad he did too, as things were needing a bit more grip than I had anticipated. The current replacement back boards from Moss Motors are much thicker, and stiffer than the original ones. This may be appreciated for the structural integrity and long term durability, but the stiffer sheet is harder to install when it doesn't like to stay wrapped in place. I had decided afore hand to try hot melt adhesive for attaching the backboard to the frame, so had picked up a 40 watt glue gun (only about $10). Glue guns can have much less power, like 20 watts or 12 watts. Considering the amount of glue we were about to lay down, the higher powered one was a good investment in speed and time.
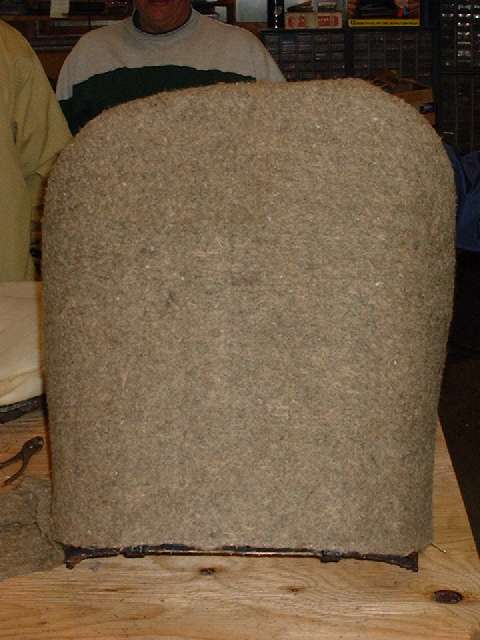
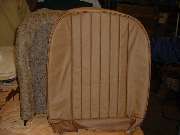
The first move was to clamp the backboard to the frame and align the edges to check the fit. While these boards are cut close to the right shape, they did need a little trimming, especially around one top corner where it might otherwise show as a ridge in the outer cover when finished. It is thick construction card stock, but could be trimmed with a large scissors.
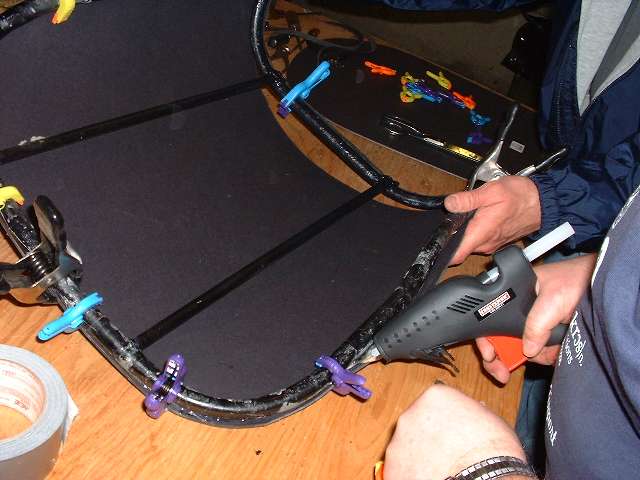
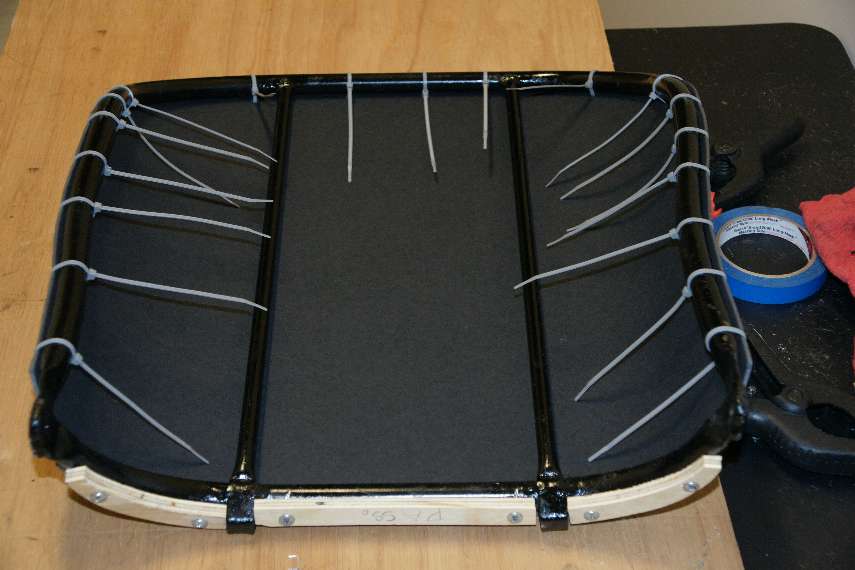
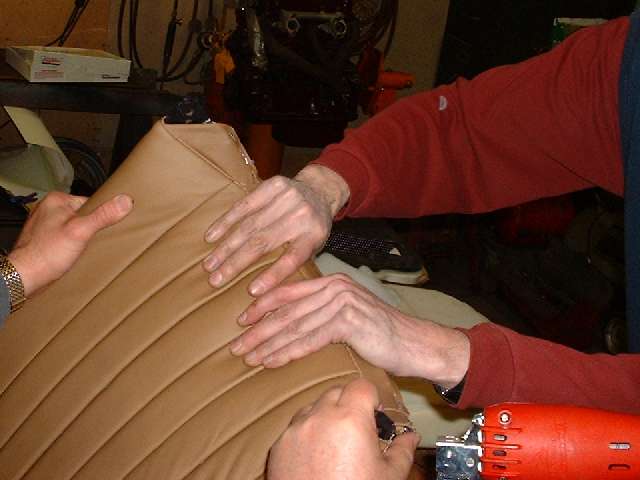
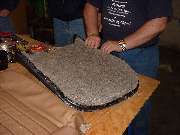
For a planned approach to gluing we started at the top and worked a little around the shoulders, then did the nearly straight part along the bottom while the board was still almost flat. With the top and bottom glued and clamped firmly in place it was time to apply a little force to wrapping the board around the sides of the frame. As the new board is fairly stiff this is not so easy as it may sound. You need to use good clamps and keep it all pinned down until the hot melt glue is thoroughly cooled. When applying clamps you need to put a strong clamp at the point where there is a concave bend in the side tubing to pull the board down into intimate contact for the full length of the tube. Run quickly with the high powered glue gun, and keep more glue sticks close at hand, because they will be consumed in rapid sequence. You might also want to wear cotton gloves, as a dab of hot melt on your fingers is a bit more serious than candle wax. Not like it does any lasting harm, but once or twice is enough to make you very cautious about touching the stuff when it's still liquid.
As good as this may sound, it's not as fast as you might think. Using copious amounts of the hot goo, it needs to be firmly clamped up and allowed plenty of time to cool. In the end it holds well and makes a neat assembly, but if I was to do it again I think I might go back to duct tape to save time. At one point Russ brought out his clothes steamer for a minute here and there to allow the paper board to relax some so it would be less prone to pulling loose the glue joints. I was actually surprised (and pleased) at how quickly the steamer worked and how well the board responded to this effort. I think we only used about two minutes of steamer on each back board, and that was a big help in getting the board to give up the fight and lay down.
|
 Addendum March 2010:
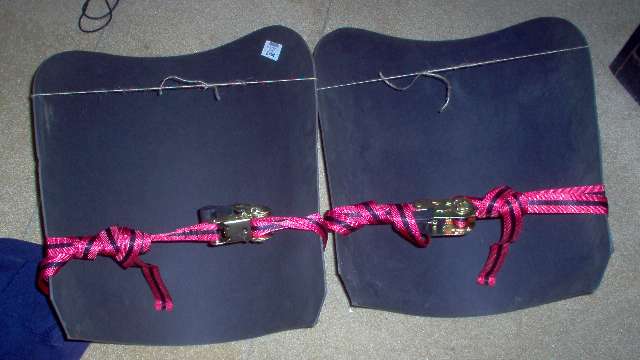
Here's a suggestion from Bill Ham in Southaven, Mississippi. He used a cord and a ratchet tie down strap to put a nice bend in the backboards, put them in the steam room at the gym for about 7 minutes, then let the straps remain in place for about 4 hours after removing from the steam room.
|
|
Addendum February 2013:
On 2/3/2013, Art Pearse wrote:
"I just attached the seat back boards to the frames. I used 5 minute epoxy rather than hot melt. It was very easy as you can do it in 4 stages, bottom, top, then each side. I was worried about having to work too fast with the hot melt. (and burning myself in the process!)".
|
|
 |
 |
 |
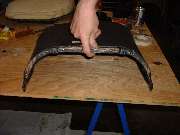 |
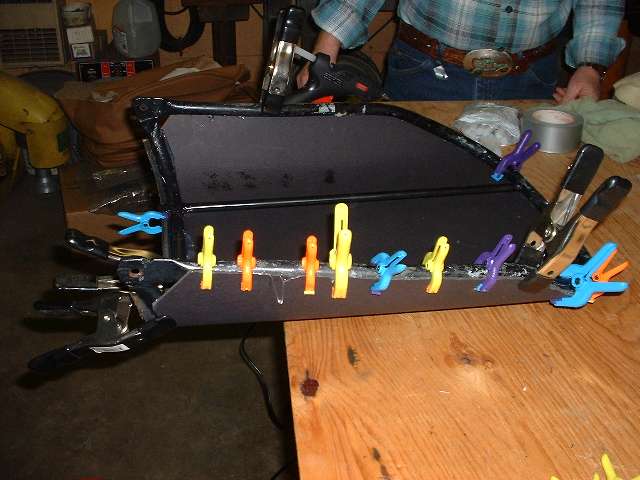
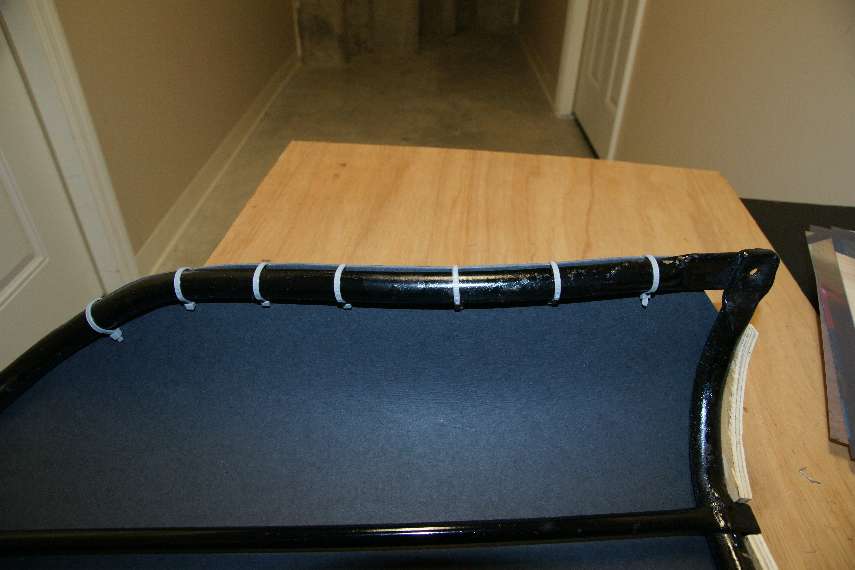
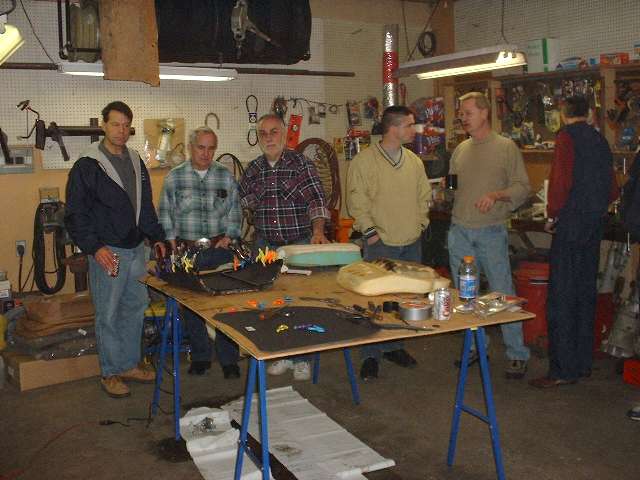
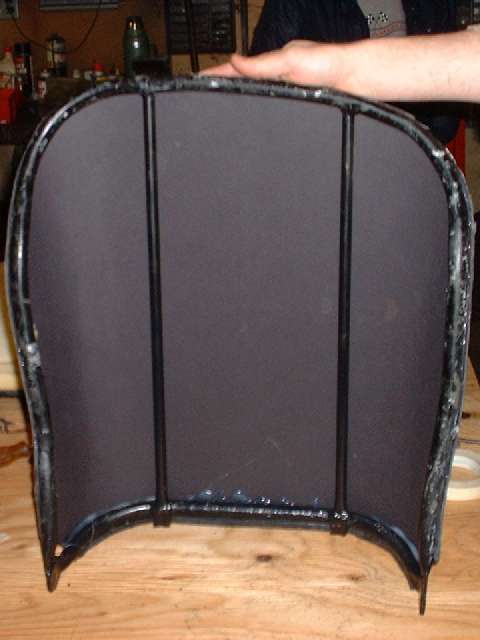
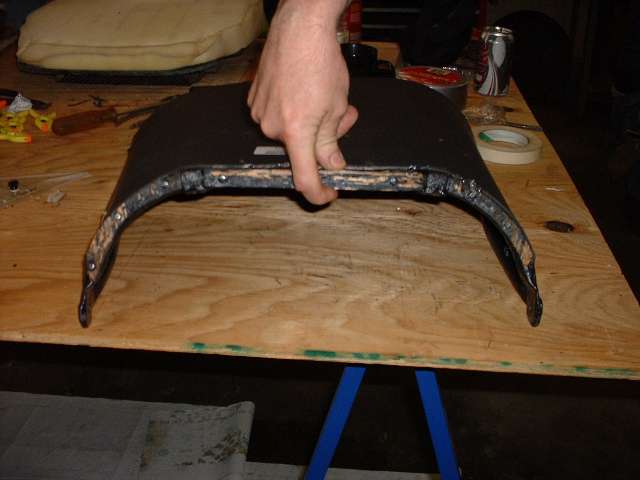
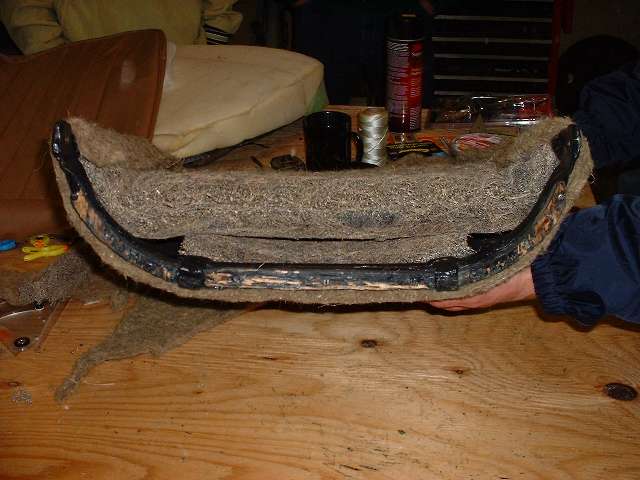
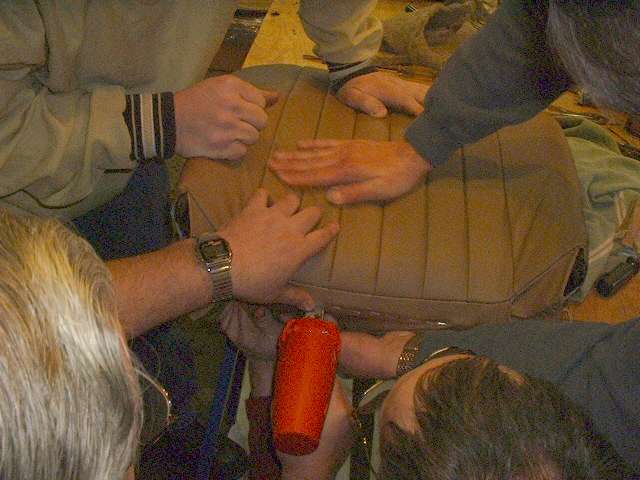
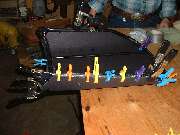
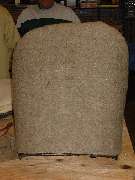
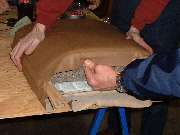
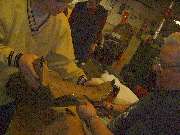
The guys got a few minutes of rest and chat before we took the clamps off, after which we had a good look at the glued assembly. Notice the inward kick in the side tubes near the bottom and how the back board is pulled in to follow. Once this stiff board is wrapped and glued you could almost bust your knuckles rapping on the back. Considering that the original back board was half as stiff and never attached to the frame, this might seem like overkill, but it sure makes a solid assembly. You should notice the depth of contour along the bottom frame tube. This is the last you will see of that as much of the depth will seem to vanish as assembly proceeds.
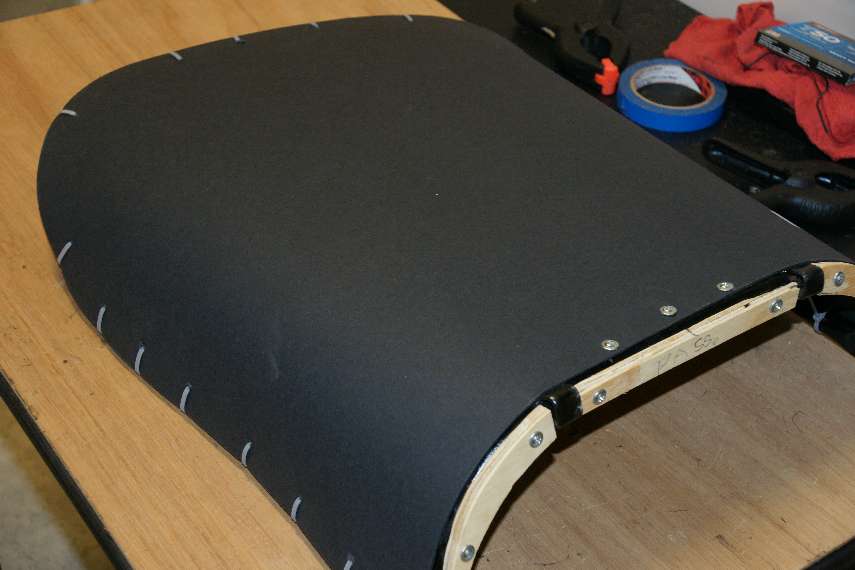
The picture at right above shows the wood tack strip screwed to the bottom of the frame. Notice also the steel rest feet at either end of the straight center section. The feet are notably directly in line with the two vertical steel tubes in the back frame. After installation, when you sit down and press firmly back against the backrest, these feet will take a very large downward load, which is transmitted through the vertical tubes to the top frame pipe, which in turn is in tension and pulls upward on the side tubes. The hinge bolts accommodate an equally large upward pull.
|
 |
 |
 |
 |
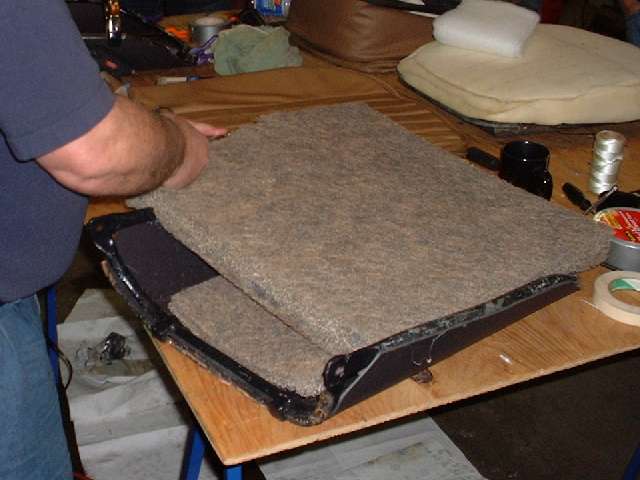
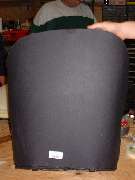
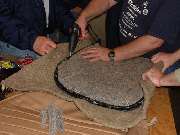
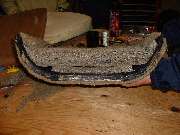
The first picture above (and third picture below) shows the lumbar support pad tucked into the bottom back of the frame behind the main padding. The replacement lumbar pad was nearly square, a little smaller side to side than the original part, but a couple inches taller. After completion I can say that the lumbar pad is definitely noticeable when you sit on the seat. I even had to adjust the seat rearward one notch from my traditional position to get away from the steering wheel. I will reserve judgment on long term comfort until I can do a long road trip. We glued the small pad in place just to be sure it would stay put, then quickly moved on to the main padding.
As the large pad is supplied in rectangular form it has to be trimmed to fit. The pad needs only a little trimming (one side is enough) in the widest upper part of the frame. The lower part has to be trimmed on both sides where the frame is narrower, and the top has to be cut to match the top curvature of the backrest. This can be cut with a large scissors, given enough patience and time, and assuming you don't get cramps in your hand. It may only want to cut a quarter inch at a snip, but it gets done eventually. A pro shop would likely have a large power scissors to save some time here. After trimming the pad should fit inside of the frame and should be snug with a bit of interference around the sides. You can leave about half the thickness of the pad exposed ahead of the tubing and overlapping in front just a bit. If you leave the pad a bit too wide it will make a sharp inside corner near the sides, probably not a good idea. Nothing is required to keep this piece in place as the compression along the sides will hold it securely.
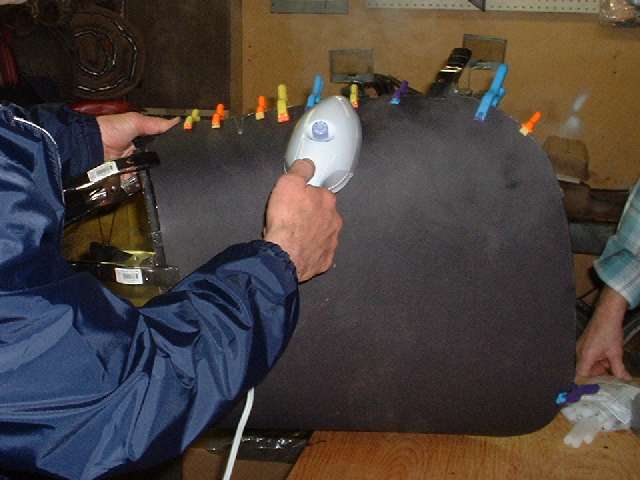
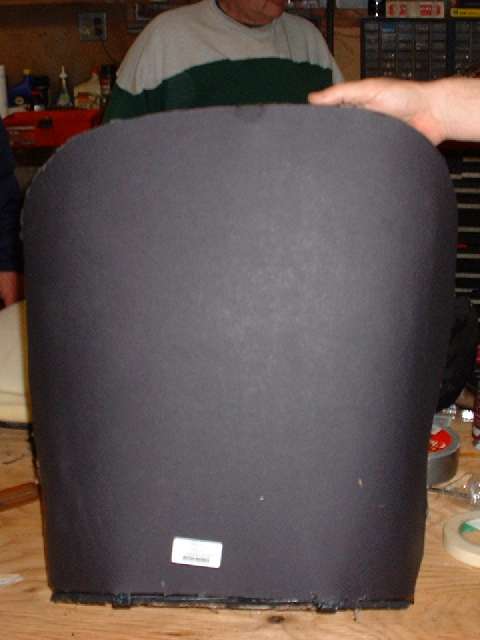
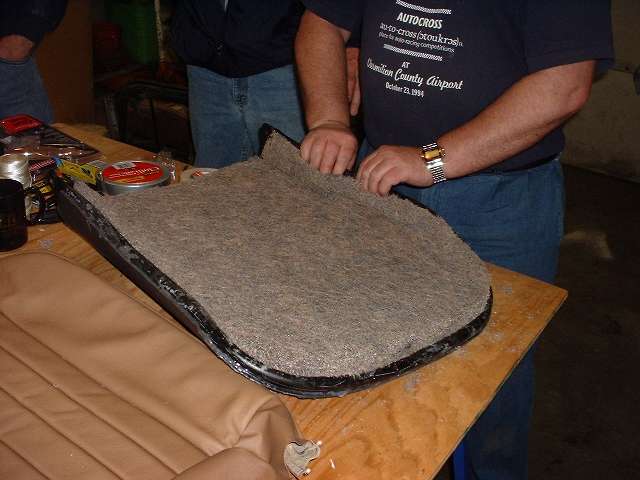
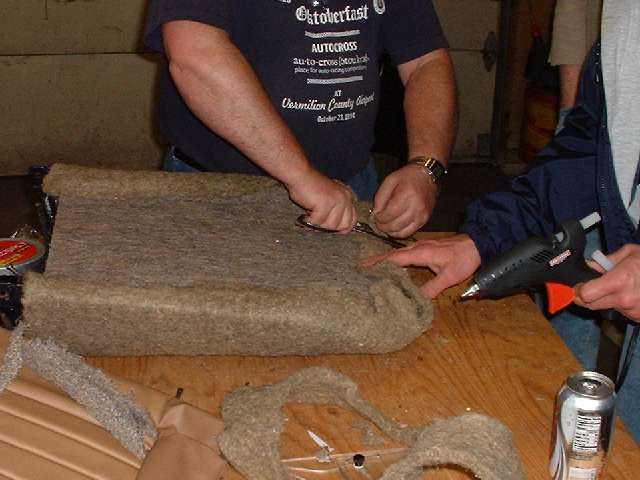
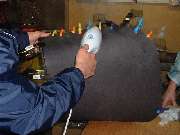
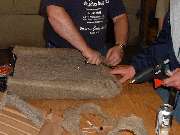
We then applied the 1/2 inch felt material to the back. The sequence here is a non-original option. Originally the outside back pad was wrapped around the frame before installing the thick inside pad. That might still be a good configuration if you were not attaching the backboard to the frame, as it was originally intended that the back padding should hold the back board in place. Here we had installed the front padding first, and then wrap the back padding around the whole assembly to have a smooth contour around the sides, which I hope makes the sides look a little thicker and better padded. Additionally I decided to use hot melt to glue this back pad in place, and that went along very quickly (third picture above) We put a touch of glue on the tubing first, stuck the felt in place there, and then glued the final edge to the horsehair pad in front. When trimming around the top of the frame the length is not very important, but you don't want overlapping layers and creases. The technique here was to pinch a large pleat together and trim off everything under my fingers to leave it laying in a single plane. One final touch of hot melt and it was finished, only needing a little trimming around the bottom corners.
|
 |
 |
 |
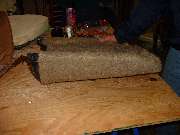 |
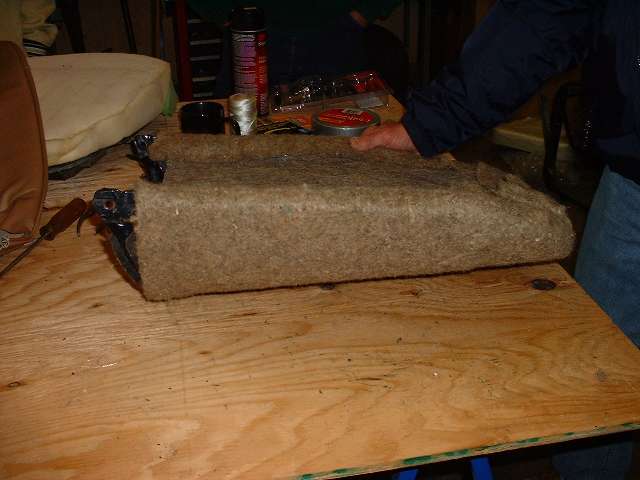
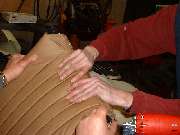
One thing for certain. When put together this way the assembly has a lot of physical integrity. You don't have to worry about anything coming loose while installing the outer cover, just slip it on and muscle it into place. Forget the stories about using a trash bag to old it together, definitely not required here. Two pictures above left show the outer padding trimmed well clear of the bottom hinge points. The third picture shows the open bottom of the padded assembly with the lumbar pad still in place. You can see there how and why much of the depth of the frame has been filled with padding. This will be compressed much thinner right at the bottom when the cover is installed. The lumbar pad will ultimately be compressed considerably around the two vertical tubes until it will lie mostly against the back board, and the front pad will once again have a little more depth. This is why the front pad should fit snug at the sides, so it will not pull away from the side tubes when it is pressed back into the contour of the back board.
|
 |
 |
 |
 |
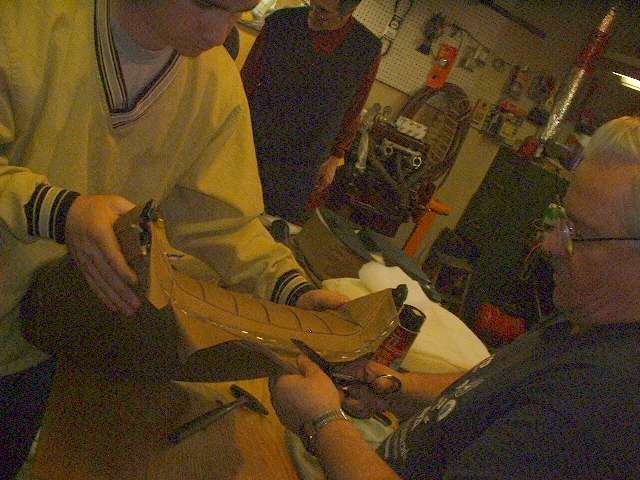
The picture at left here shows the loose cover matching the top curvature of the backrest, angled a little to one side, roughly matching the curvature of the car body. In fact if the side curtain stowage bag is not in the way behind the seats, when the seat is slid all the way back it will just clear to go back under the body tonneau. This is an important feature of the roadster seat which is different from the coupe. In the coupe the seat back is nearly flat across the top with similar curvature at the shoulders, and both sides being equally as high as the high side of the roadster seat back.
One of our guys has explained how to convert a roadster seat to a coupe seat. You can cut the central vertical tubes and the one short side tube at a point where it runs near vertical. Then lift the low shoulder until it is as high as the other side, which will induce a slight angle in the top part of the cut vertical tubes. Bend the top part of the tubes back into alignment with the bottom part, splice in short extensions to the cut tubing and weld in place to restore the original integrity to the structure.
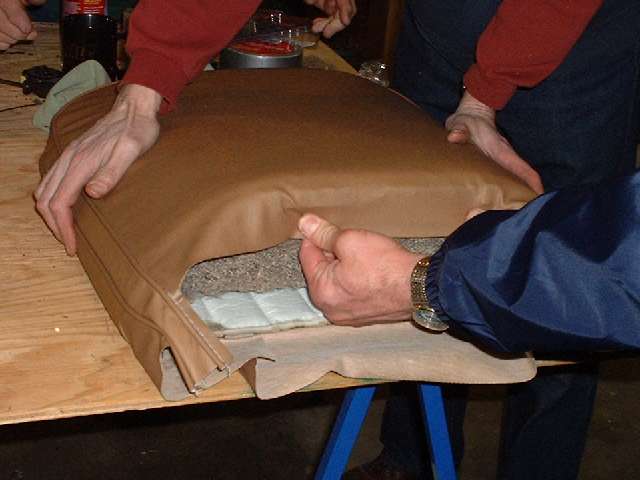
Notice also that the cover appears to be wider at the bottom, even though the backrest is narrower at the bottom. This makes it easy to slide the cover over the backrest, and the seemingly extra material in the width will ultimately be wrapped into the depth of the backrest contour. The second picture above shows the nice extension handles on the sides of the cover. This makes it particularly easy to slip into place, especially if there are two pairs of hands available. Just grab the ears and shove the padded frame assembly into place until it bottoms out firmly in the top end of the cover.
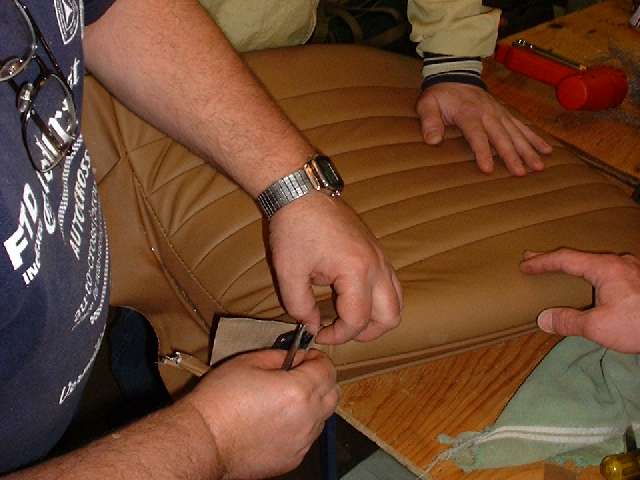
When you are satisfied that the cover is properly aligned (centered in front) and nicely seated at the top of the frame, pull it down tight at the back center and tack it to the bottom wood strip. Stay aware not to drive staples into the steel rest feet. It is okay to leave the thin fabric covering the steel feet, as long as you understand that it will likely wear through at these points after some use on the road (but no one will ever notice). Continue stretching and tacking from the center toward the sides until you reach the ends of the wood strips. No need to trim anything here, as any excess material will be hidden inside after the front surface is also tacked down here.
The last picture at right above shows the front surface of the cover pulled down tight and partly tacked in place at bottom center. This is the time to split the material at the side to clear the hinge point, trim it back to a shorter length, and tuck the tail up inside to give a nice finished edge on the side. More of that is shown below.
|
 |
 |
 |
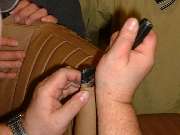 |
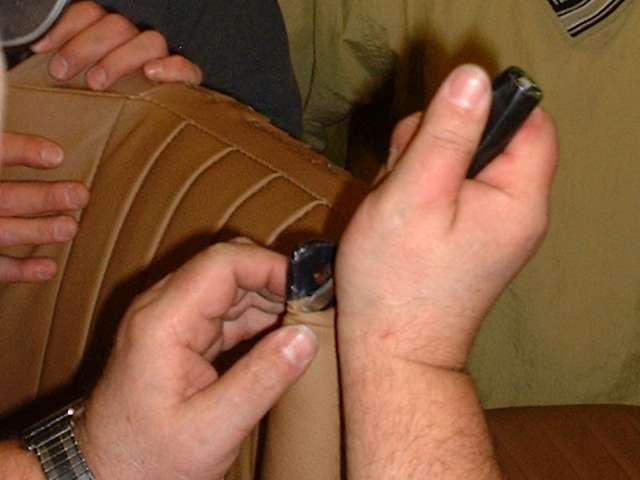
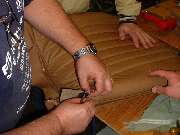
To finish the outside corner in front you can fold the fabric under at about a 45 degree angle, pull it down tight and staple it to the wood strip. That result is shown in the picture above left, covering pretty much everything except to leave the steel hinge point exposed. At about that time you may want to R&R the center tacks to pull the front fabric tighter at the bottom. When finished it should have a fairly even margin all the way across. The second picture above shows final trimming of the excess fabric. You might need a couple of finishing staples and a final tuck at the corners, but otherwise it's done. In the third picture above you can see how thin the assembly gets right at the bottom, having considerably compressed the stuffing near the edge. The last picture above shows a final tuck at the side to pretty up the visible exposed bottom edge just above the hinge point. Be sure you leave enough space around the bolt hole to accommodate a flat washer and the size of an open end wrench.
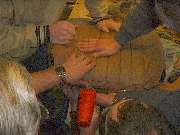
In the picture below left is the center arm rest. This is supplied with the seat cover kit from Moss Motors. It has a plywood base board and a foam rubber cushion. The cover is leather on the top and vinyl on the sides with the leather seat kit, or all vinyl with the vinyl seat kit. Assembly of the armrest is very simple after doing the seats. Slip the cover over the pad and stretch tight at the back to bring the front into intimate contact with the pad. Tack at the back underneath first, then stretch and tack at the front, followed by stretch slightly and tack at the sides being careful not to leave wrinkles or puckers in the sides. The first time I did this I was trimming the whole interior, and I had some piping left over from the cockpit rail project, so I added piping around the bottom of the armrest. This may be a matter of personal taste, and is strictly optional. I decided to skip it this time. The piping is not supplied with the seat kit.
Now how (or if) you attach the armrest atop the center tunnel is up to you. I can tell you that a large variety of adhesives are prone to failure if you try gluing it on top of the carpet. Velcro might work well if you sew the bottom half to the carpet and staple the top half to the base board. If the gearbox is not in the car you could drill the tunnel and install wood screws from underneath. I'm happy to just leave my arm rest loose so it's removable if I have to go crawling under the dash, and I just toss it out when I go autocross.
|
 |
 |
 |
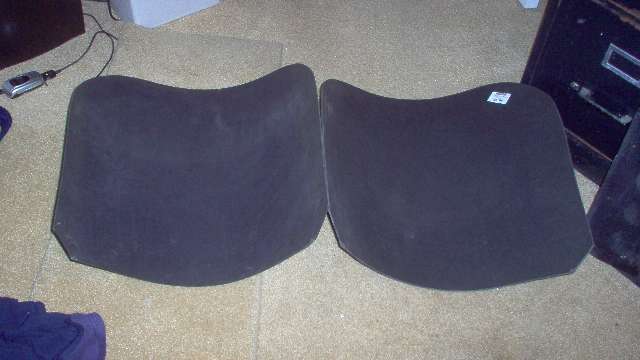
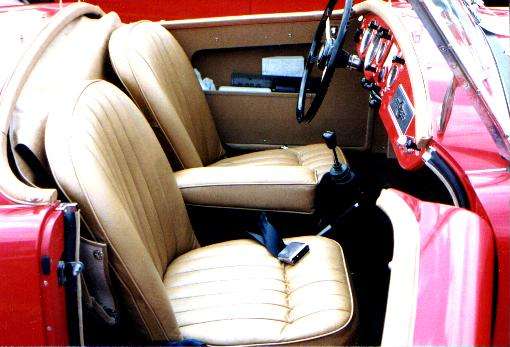
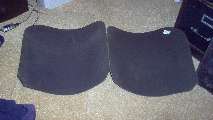
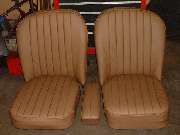
Here we have the finished seats ready to install in the car. Assuming the base frames and slide rails are already in place it's only four bolts for the backrests and drop in the bottom cushions. In the photo at left the base cushion on the right shows the small ridge in front seen previously, which is the result of having no padding in front of the wood base ramp. This cushion is also thicker in front and nicely contoured on top, being the one with the molded foam rubber insert. The other base cushion shows a slightly irregular bulge in front which is the result of the green foam pad seen earlier in the assembly pictures. It is also thinner and quite flat on top. This is the one containing the "trim to fit" cut and glued foam insert. Having the opportunity to sit on both of these cushions I can say the flatter one is definitely lacking in thigh support, and somewhat less comfortable on a long trip. But if you happen to be particularly tall and want the seat to be closer to the floor, then maybe thinner might have some advantage.
Looking at the backrests you can see the nearly flat area near the top, and starting about half way down the slight forward bulge created by the lumbar support pad. I like the feel of the lumbar support, but after a couple of decades doing without, it will take a little getting used to. This is not quite the same comfortable old worn sneakers, but give me another 10,000 miles and I'm sure I can make it comfy home again.
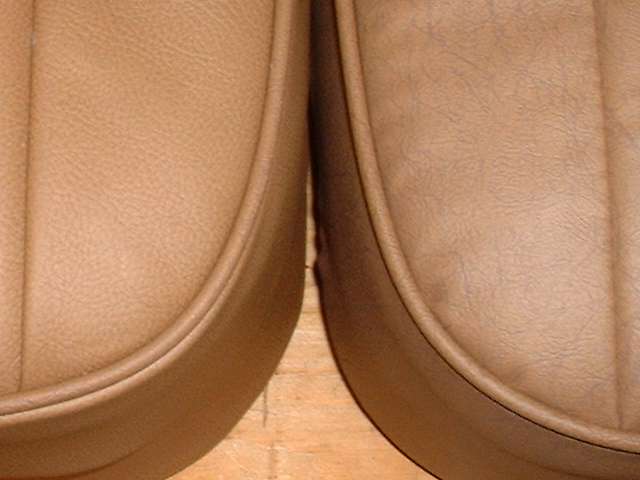
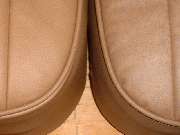
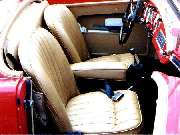
The center photo is a close up for comparison of a leather cover on the left and a vinyl cover on the right. While it is a noble effort to make the vinyl look similar to the leather, it will never be perfect. But with time and wear (and a little dirt and age stains) I think the leather will eventually get to looking more like the vinyl, at least in color, so maybe it's not such a bad match after all. Of course I'm still going to miss the lateral pleat it the cushions, but such is life. The photo on right is the same picture from the earlier installation. When I get another bright day outdoors I will see if I can get another similar picture with the new covers for comparison.
MGA Seats Rebuild - Page 2 of 2 - Go back to Page 1
|
|