The MGA With An Attitude
COCKPIT REAR RAIL AND SIDE CURTAIN STOWAGE BAG -- INT-107
 Refurbishing the rear cockpit rail will be even easier than the front one, and hanging the side curtain stowage bag is also easy. There is nothing at all in the way here. Start by removing the old assembly from the car, just five little hex nets and some washers from the back, and it's off (unless you end up having to fight some rusty threads).
Don't be alarmed if you don't find a window bag on your MGA. In years past many a prior owner may have simply cut the thing off and tossed the side curtains in the boot, possibly to free up some seat sliding space for the longer legged driver, or maybe just because the old window bag looked bad, and there wasn't budget money to replace it. Even in the absence of a window bag, you may still find the cut off fragment of the top edge left tacked on the back of the rail. Every MGA Roadster would have been shipped from the factory with the side curtain bag installed, unless the car may have had the "delete it" option on special order.
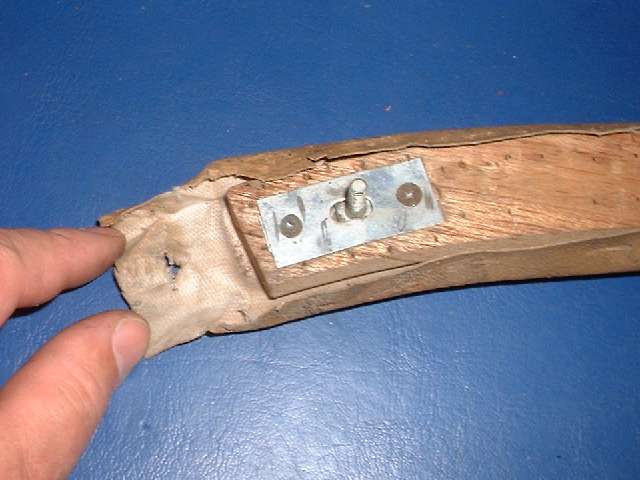
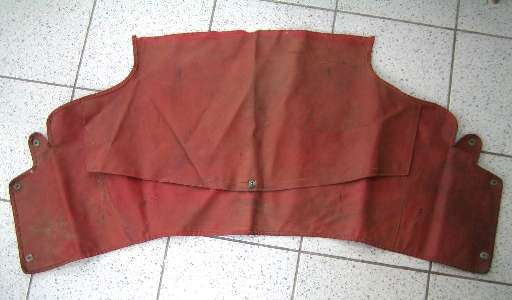
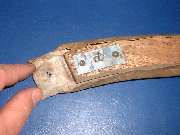 Stripping the old covering from the rear rail you should find a solid wood rail with five flush metal plates in the back holding floating studs, the same parts as are used on the door top rails. You may or may not need to replace some of these studs. The only admonition here is to steer clear of the metal plates when driving tacks or staples, and maybe buff off any sharp corners on the ends of the rail. Recovering the rear rail goes pretty much the same as the front rail, but no worry about metal end plates. So I will skip all of that, except to tell you not to install the trim piping until after the side curtain stowage bag is installed.
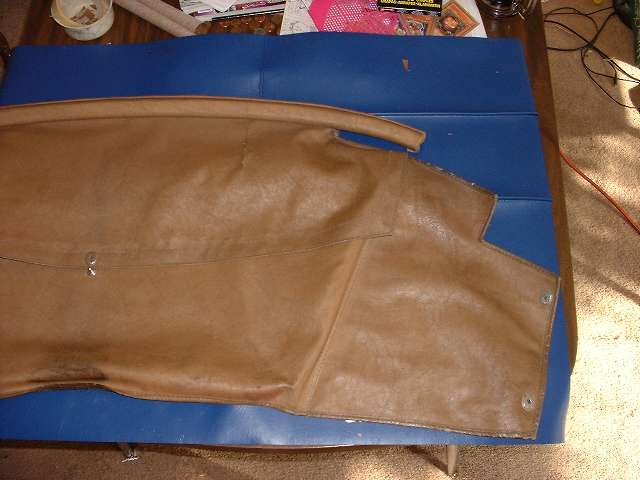
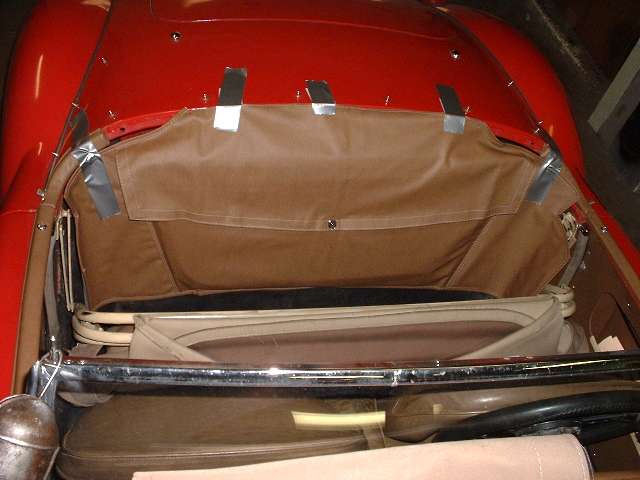
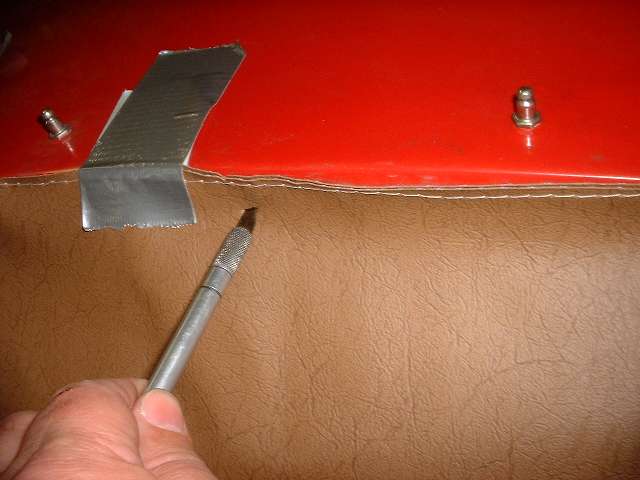
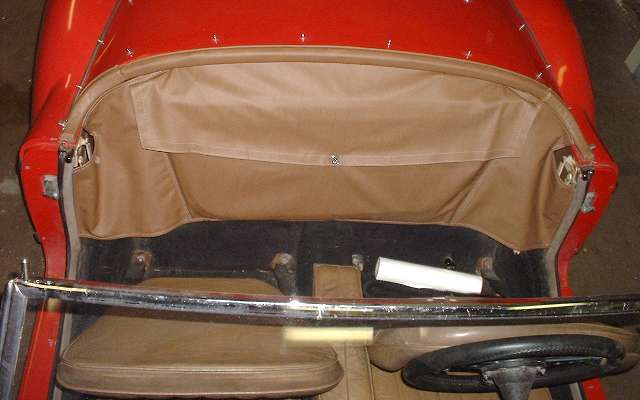
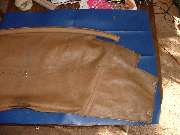
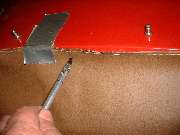
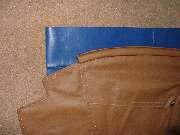
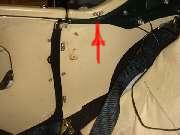
  Here you see the test fit and alignment of the side curtain stowage bag in the car. To get the alignment right you need to first place the side curtains in the bag, upside down with hooks to the rear, and button down the front flap on the bag. Then hang the whole assembly temporarily in place with tape (picture far left). For the MGA 1500 and early 1600 style, the bottom center of the assembly should be just touching or sitting gently on top of the tunnel carpeting (picture near left). You may need to hang the bag a little higher than you might expect, where the top edge of the fabric might extend slightly above the top of rear body tonneau panel. Not to worry about that condition, as the top edge of the fabric can be trimmed later, after the bag is attached to the rear cockpit rail. What you don't want is to hang the bag too low, where you would end up with a large wrinkle and a divot in the bottom center of the bag (see first picture on this page, top left).
There is a difference here with the late 1600 and all 1600-MK-II style window bag installations. For those cars the entire bag assembly with the side curtains inside should sit on top of the battery cover, and may be pushed farther back at the top, more underneath the steel body tonneau panel. This type of installation is entirely dependent on having the later style folding top frame which will allow the top assembly to sit a little farther back when stowed. Those cars should also have a small upward extending metal tab on the front edge of the battery cover to keep the bottom edge of the bag from sliding forward. You need the correct bag for the matching application, as the later model bag is a bit shorter in overall height.
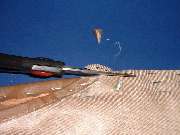
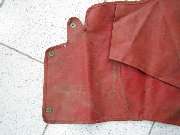
 Then poke around a little to find the location of the three holes in the body panel behind the top flange of the window bag. Use a pointed razor knife to cut small cross slots through the fabric in these locations where the rail mounting studs must pass. With alignment finished, remove the side curtains from the bag, and pull off the tape to remove the bag from the car. Position the bag on the back of the trim rail, cloth side to the rear and vinyl side facing the rail, pressing the three newly cut cross slots over the studs on the rail. Pull the fabric gently toward the top of the rail, and staple it in place. Don't be shy about using a few extra staples here, especially near the outer ends of the top flap on the bag. This has to support the weight of the bag (including the side curtains) as the car is bouncing down any rough road you might like to travel.
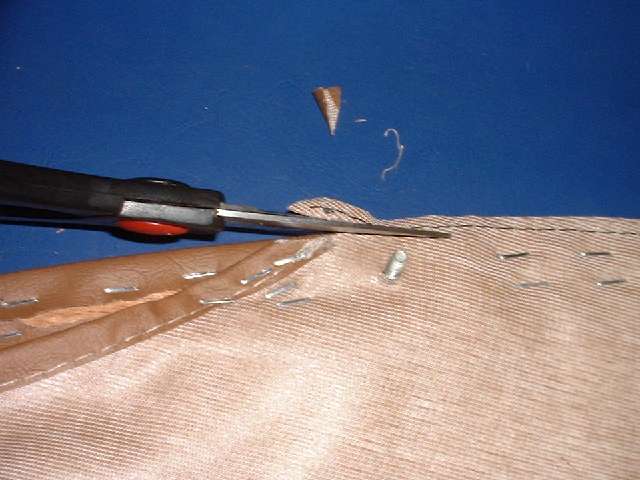
 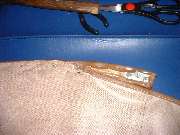 With the bag secured to the back of the rail, trim away any excess material extending above the top edge of the rail. Not to worry about cutting off the stitching line, as all fabric layers of the bag are securely stapled to the rail. When trimming is finished, install the top edge piping in similar manner as with other trim rails, snug against the side of the rail, flush at the back, and folded in at the ends.
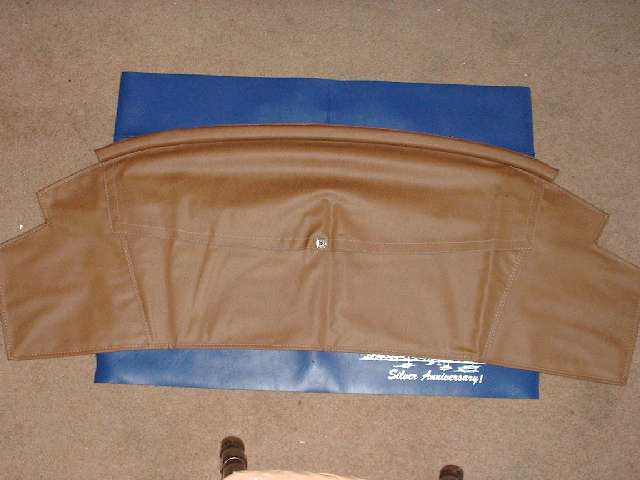
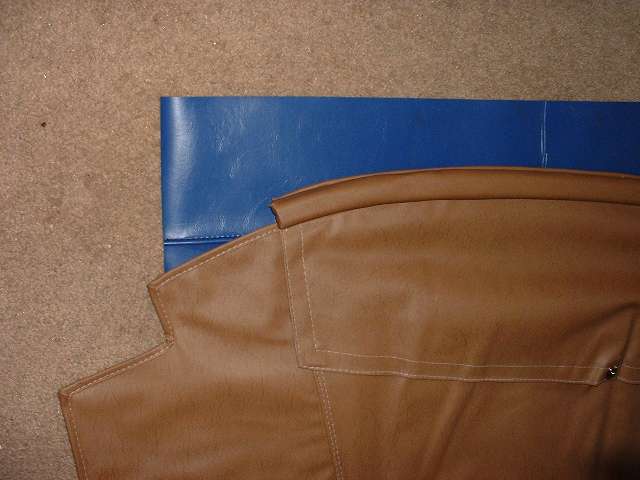
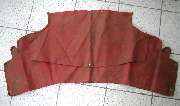
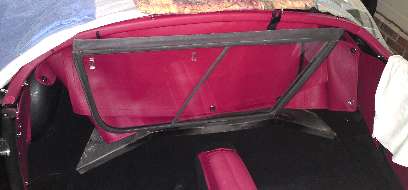
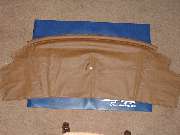  Here you see the finished rear trim rail with the side curtain stowage bag attached, ready to be installed in the car. Nothing could be simpler, just hold the rail in place on the rear body tonneau, install a flat washer and lock washer and hex nut on each of the five studs, align ends of the rail with adjoining corner rails, and tighten the fasteners.
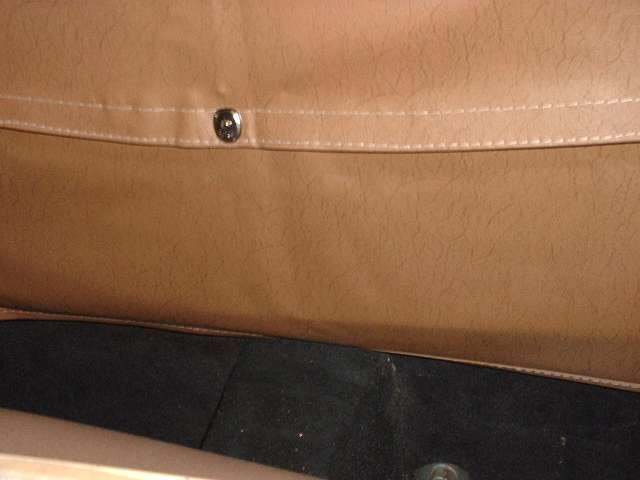
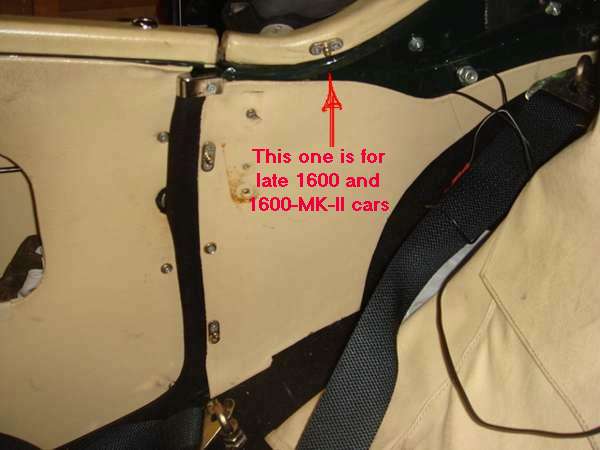
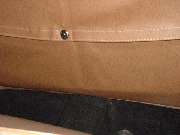
 All finished with the installation, put the side curtains back in the bag, upside down with hooks to the back, and button down the front cover. If you want to, you can install Lift The Dot studs and fasteners at each side flap of the bag to secure it to the inside wall just behind the door weather strip trim piece. There would be two flanged LTD studs each side for the 1500 and early 1600 style bags, and three fasteners each side for the later style installation (photo below right). The top stud is 3" down from the top of the chrome cap, and the next one is 7" lower. The third stud (when used) is on the cockpit corner trim roll 3" back from the front end.
This time around I elected to omit the LTD fasteners on the sides, simply because I never use them. I could never get the top frame pushed back far enough to allow attachment of the LTD fasteners to the side studs. This may have to do with using a spare tire one size larger than original, which may hold the folded top slightly higher and/or farther forward than original as delivered from the factory.
 Having been around this web site a few times, you may recognize this last trick. I just happen to like dropping the tonneau cover in front of the window bag, just to keep the cover handy for quick use when I might leave the car unattended for a while. From that position two people might raise and secure the tonneau cover in about 10 seconds flat, or maybe 30 seconds for one person having to run around the car once. Unbuttoning and dropping the cover back into place behind the seats is just about as quick.
Photos below left and center show configuration of the later style bag with the third LTD fastener on each side. This style bag was originally intended to sit on top of the battery cover rather than in front of it, and would coincide with the later style folding top frame that stows a little farther back.
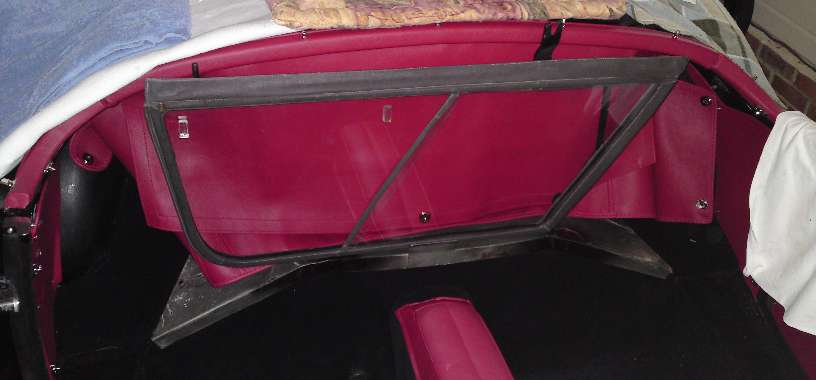
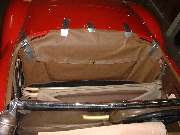
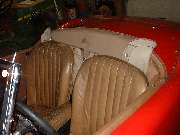
 Here is a picture of the late production 1600 type car with the stowage bag sitting on top of the battery cover (and later articulation style top frame). I don't know what the factory had in mind here. I have tough enough time fitting mine in under the cockpit trim roll with the bag just touching the tunnel carpet.
AMCO had a partial solution with articulated brackets. See near bottom of side curtains page. There is no mention in factory books of an articulated bracket. I have never owned a later model with the L-bracket on the battery cover (and later articulation of the top frame), so I don't know how this is supposed to work. I have generally had some warped dream about the side curtains in the bag sitting at some odd slope to reduce the overall height. I have been waiting for years for someone to supply a picture of the assembly in situ to show how it might work.
|