The MGA With An Attitude
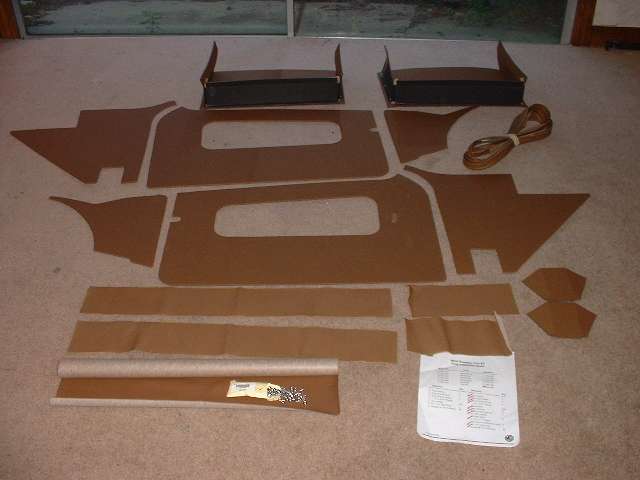
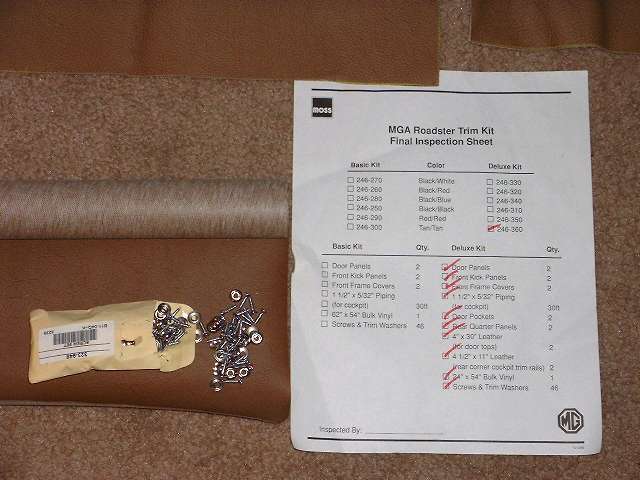
The car was restored at 150,000 miles, including all new interior and trim. But 180,000 miles later that "new" interior was getting pretty tatty again. Door pockets were getting ugly from a few spilled drinks, and kick panels had been kicked too many times, and the side curtain stowage pouch was torn. But the sore spot that said it was past due was the driver side door rail where I like to rest my arm when cruising. So I bought another door pocket and kick panel kit from Moss, which comes with the fabric and piping to do the cockpit trim rails. And away we go.
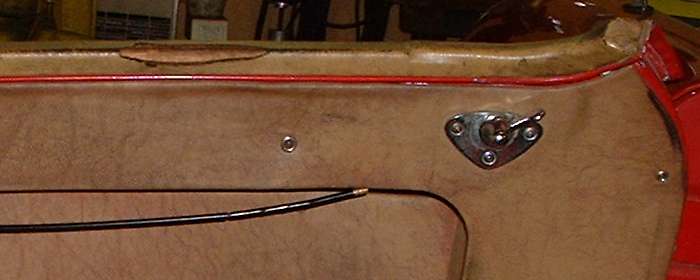
 Here we have some of the naked truth exposed. The stiffener bar is attached to the door with two small sheet metal screws. Replacement bars may not have the holes in the same exact location as originals, and replacement panels may not be exactly the original configuration. During assembly you can align the stiffener bar by laying it on the edge of the door panel aperture while the door panel is aligned at the edges of the door shell. You might secure the bar temporarily to the door shell with sticky tape until you're sure where it should go, then drill new holes for the screws. See last paragraph at bottom of page for notes on installing sheet metal screws.
 You want the stiffener bar to lay flat against the steel door shell so the bar doesn't bow and the screws might stay tight. Here you need to cut back the flange on the door pocket. I like to just make two cuts to form a large tab on the pocket flange, then tuck the tab inside the door shell opening. That way the vinyl will be more resistant to getting frayed at the edges. 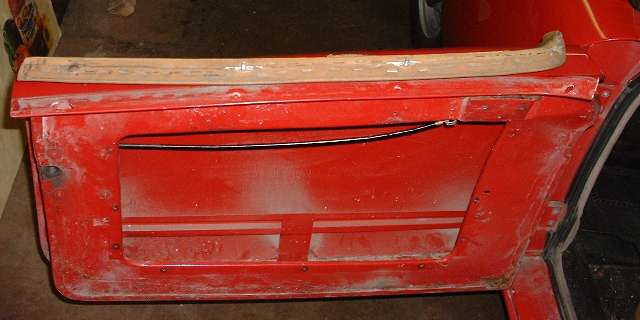 When you get the door pocket out you are likely to find a generous dose of dirt and some flaking paint or rust inside the door. This one got to this condition in just 5 years and about 50,000 miles since the last repaint, being driven on all kinds of roads in all types of weather. Some of course may be in considerably worse condition. While this is an excellent opportunity for a little clean up and touch up, you might make a discretionary decision not to get too carried away and end up doing a full restoration. Or maybe you already did?
 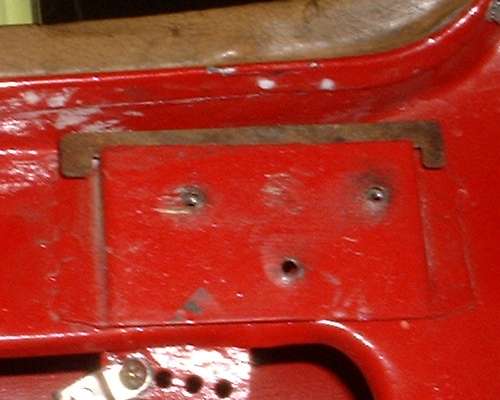 The side curtains can take a bit of a beating over the years, and/or the door panel may have to be removed a number of times. If/when the screws holding the side curtain mounting plate work loose, the screw holes can get stripped out and may not hold the sheet metal screws. Here's a little repair trick I applied many years back which is still holding up well. I cut a heavier gauge steel plate to fit inside the pocket, leaving small flanges at the top to hold it at a fixed height. Then I drilled the new plate to hold the sheet metal screws. After quite a few years one of those holes eventually stripped out, so I reversed the plate and drilled new holes again. If this should ever get stripped out again, I swear I will install PEM nuts or weld hex nuts to the plate. Then I could switch to using fine thread machine screws, which should be more secure and would probably last forever. The important point here is that it now has a removable tapping plate to facilitate easy thread repair.
 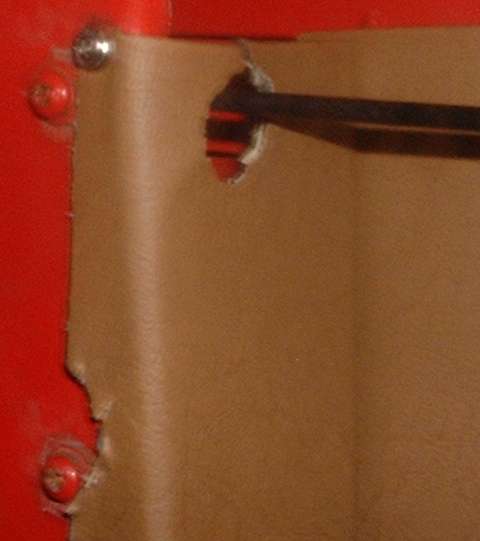 The latch pull cable passes through the door pocket at the rear. Here the original prescription is a round hole in the back of the door pocket, a thick rubber grommet placed in the hole to cover the fabric edges, and the latch cable passed through the grommet before being attached at the front. While it may be somewhat satisfying to do it right the first time, in the long run you have to be a bit of a masochist to keep it up. The door latch will need occasional attention for a number of reasons, not the least of which is that the latch pin eventually wears out (maybe more often than you like). It is generally easiest to remove the door pocket to get at the latch, and a lot easier to do that if you don't have to disconnect the pull cable. To that end, I like to make a vertical cut from the hole to the top of the pocket where the cable can lift out without having to disconnect either end. Unfortunately, because this hole is near the flange bend in the pocket material, the rubber grommet doesn't like to stay in place, so I leave that out as well. It may look a little ragged up in there, but generally no one will notice when the inner panel is installed.
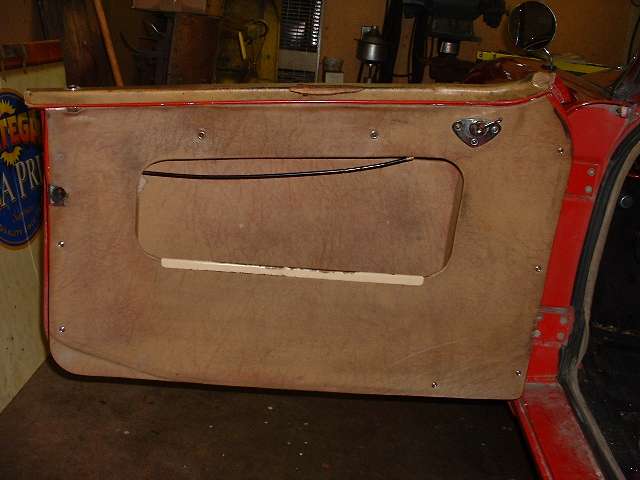
 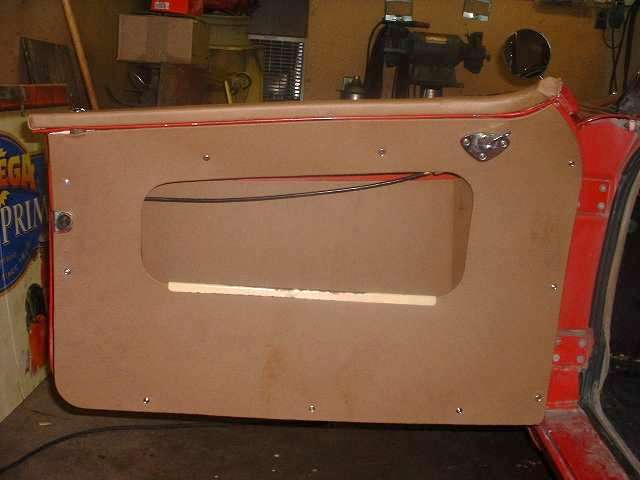 Now we're getting there, and things look better with the new pocket and panel installed. Notice the two screws at the top of the panel, just above the pull cable. In this location the panel should have a slightly tapered wooden spacer strip tacked in behind to bring the panel out flush with the top of the door shell. These screws also need to be longer than other panel screws. I sometimes like to get my fingers in behind here when pulling the door closed from inside, and when that happens, I might occasionally get a rather irritating prick on the finger from one of the screw points. So I like to install another thin wooden strip inside the door shell here to cover the screws and save my fingers.
 When installing all of these screws, you might be tempted to poke around with an ice pick or a scratch awl to find the original holes in the door shell and put the new screws in the same location. Well don't bother. It's a bit of a pain, and like as not you may end up with some stripped out holes and a few loose screws. So just pick some good positions to hold the panel flat around the edges, and drill new holes for the new screws. Get them within an inch of the originals, and you should do fine. That's what they did at the factory too, so no two cars have the panel screws in the same location anyway. It is a good idea not to put the screws too close to the panel edges, so as to avoid drilling into the double layer steel at the door shell weld flanges. And also avoid the area of the door latch and hinge mounts. When installing sheet metal screws, drill a hole equal in diameter to the root diameter of the screw, or just a bit larger, and the screw will form its own thread the first time it is installed. If the hole is too large the screw will go in easily and may strip out the thread. With correct size hole it takes some torque to cut the thread initially, but the screw will ultimately have a good bite in the metal to stay put without stripping the threads. Drill a test hole or two to determine what drill size is best for the given screws. It is better to start a little small, and if the screw won't go in then go to the next larger drill size in 1/64-inch increments. It is moderately easy to strip the threads on these small screws or even break the screw, so don't over tighten them for final torque. Once you determine the right drill size for the sheet metal you can drill right through the panel and sheet metal and install the screw immediately. The cover panel material is soft enough to yield easily to the screw, so there is no need to drill a larger hole in the cover panel. Addendum November 2010: |