The MGA With An Attitude
SPIGOT BUSHING REPLACEMENT -- CS-105
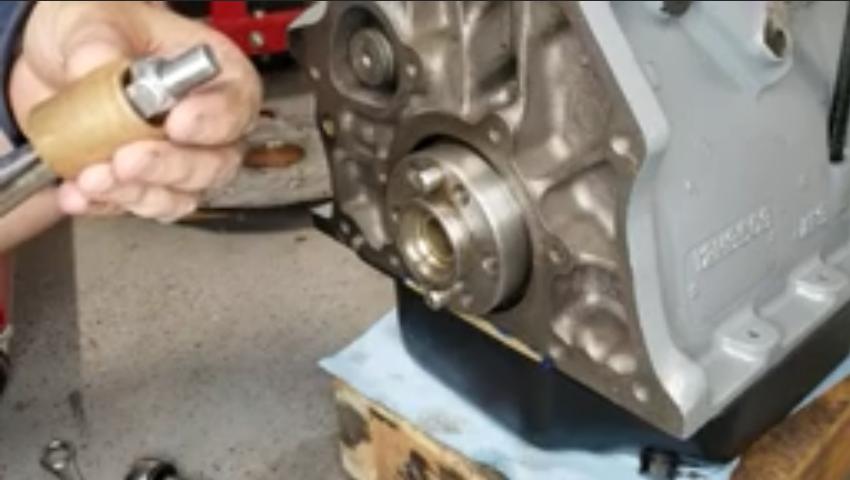
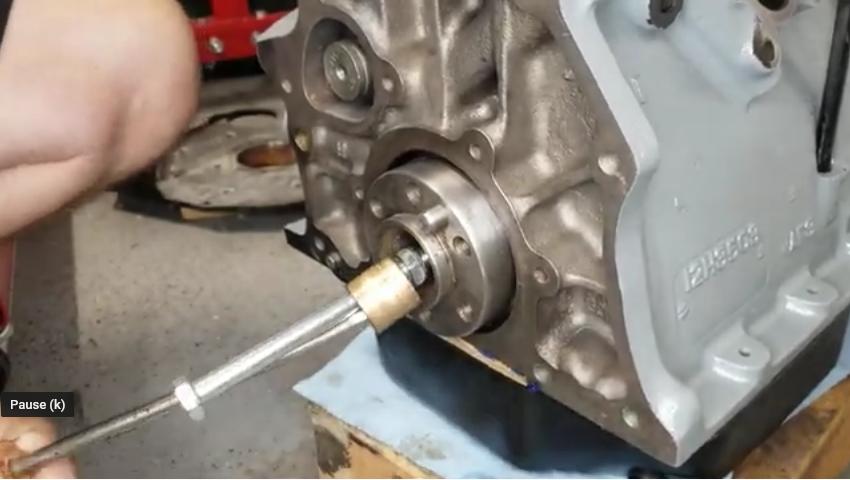
For those not familiar with the term, the spigot bushing is a bronze sleeve bearing in the tail end of the crankshaft which carries the nose of the gearbox input shaft to provide proper alignment of the clutch disk.
At 06:55 PM 3/5/05 -0700, Stan Watkins wrote:
"How do you replace this bushing? I tried threading in an adapter with pipe threads to use with my grease gun, but the threads did not get enough bite on the bearing."
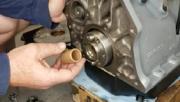
REMOVING the old spigot bushing:
You could try the fast way first (but it doesn't always work). Fill the hole with grease, insert a metal rod to fit the bushing (5/8 inch diameter for the MGA), wrap it with a shop rag near the crankshaft (to stop splash back), and hit it with a hammer. If the bushing is not too badly worn the hydraulic pressure may push the bushing out of the bore. If the bushing is badly worn leaving a lot of clearance around the metal rod, you might only get a rag full of grease and no bushing.
For a more positive approach, you could make up a special fitting with a pipe thread slightly larger than the bore of the bushing (3/8-18 NPT pipe thread for the MGA) with reducers and a grease fitting. Tap a pipe thread in the spigot bushing, screw in the special fitting, and pump on it with a grease gun. The hydraulic pressure should push the bushing out of the bore. Success here mostly depends on having a good seal for the pipe threads, so you might need to use Teflon thread sealant tape in the threads.
 Also found in many of the slide hammer kits is a "puller hook" or "fender lip puller". This hook tool might be a bit oversize, so it may need to be ground down to fit inside the spigot bushing, and the hook tip may need to be ground back slightly. When properly formed you can insert this hooh into the bushing, then tilt the tool slightly to lock the hook in behind the bushing. This should easily and quickly pull the bushing out.
On 5/31/2022, Erik Gryler wrote:
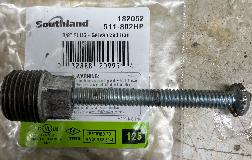
"Bought this plug from Home Depot for $2.15, drilled and tapped it
for the long screw you see. Tapped the plug into the spigot bushing as you
described, backed it off half a turn and then screwed in the long screw
until it bottomed out in the crank recess, kept turning, thereby pushing the
bushing out".
There is also a formal bushing puller tool available at many local auto parts stores. Kind of a specialty item, but you may find more uses for it. This may also pull a bushing out of a rocker arm.
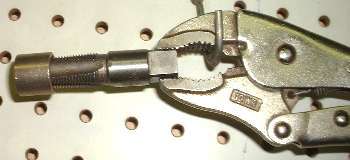
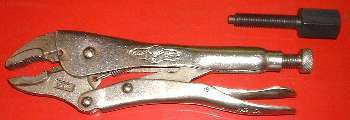
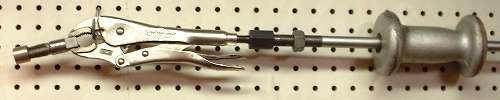
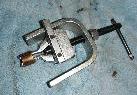
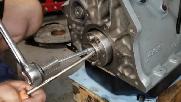
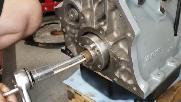
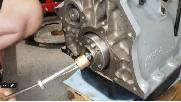
Here's another trick I once used in a pinch when other tools were not available. Find a short length of 3/8-inch iron pipe (which is larger than 5/8-inch OD) with a thread on one end (3/8-18 NPT). Present the threaded end to the bushing, hold straight, press firmly, and screw the pipe thread into the bushing using a ViceGrip or Channel-Lock pliers, or even a pipe wrench. The sintered bronze bushing is soft enough to deform a little, impressing the start of a female tapered pipe thread. You can screw it in a few turns this way. When it starts to get tight, back the pipe out a little and go again a little at a time. When a few more tries you can go another turn or two to form a deeper thread with more bite in the bushing. This method will be expanding the bushing to be very tight in the crankshaft, so before you start pulling, back the pipe up a bit until it is only hand tight in the tapered thread. Then grip the pipe with a large locking pliers (ViceGrip), and use a pry bar between the tool and the crankshaft flange to pull the pipe, and bring the bushing out with it. Keep the pipe straight in the process so you don't tilt it sideways and tear the newly formed shallow thread out of the bushing.
Addendum April 2007:
Here is another method for removing the spigot bushing, if you don't have a pipe tap. At 09:19 PM 4/10/2007 -0800, Del Rawlins wrote:
"I thought I would share a variation on your spigot bushing replacement method. Instead of using a pipe thread tap, I ran a regular 3/4" coarse thread tap down as far as it would go, then removed it. I threaded a 3/4" nut all the way down to the head on a 3/4" bolt, then threaded the bolt into the bushing with a big flat washer on it. Once the bolt was all the way in, I ran the nut down and tightened the nut while holding the bolt and crank stationary. This drew the bushing part way out, until it was flush with the crank flange. After loosening the nut, I was able to get a pry bar under the washer and pry the bushing the rest of the way out. The outside diameter of the tap is smaller than the outside of the bushing, so as long as it is done straight it doesn't touch the crank."
Addendum, June 6, 2022:
Here's a neat tip from Alex Platacis, (and I must say, sometimes some of the simplest
 things escape me for a long time). You need a hex nut that fits through the bushing, a long bolt the fits the hex nut, and a ratchet wrench that fits the bolt. Hook the nut behind the bushing, hold it to one side with the screw driver, and wind it out with the wrench. How easy can this be?
And if the pictures haven't done it for you yet, there is also a three minute video.
INSTALLING the new spigot bushing:
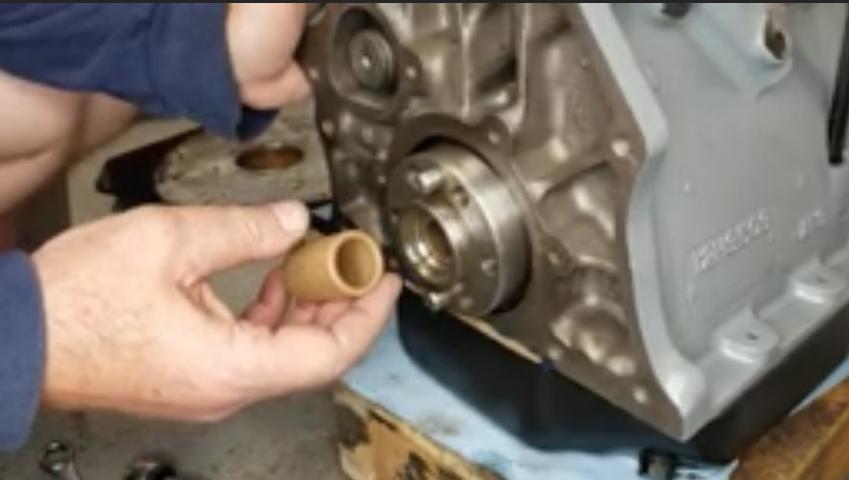
It is good to soak a new bronze bushing in oil for 24 hours before installation. A touch of engine oil or graphite oil or even dry powder lube (molybdenum-disulfide powder) just before mating of the engine and gearbox is good. A touch of grease is okay if applied immediately before installation, and if it is to be used soon after installation. Grease is not good for long term storage, as it may dry in place and cause the shaft to seize in the bushing.
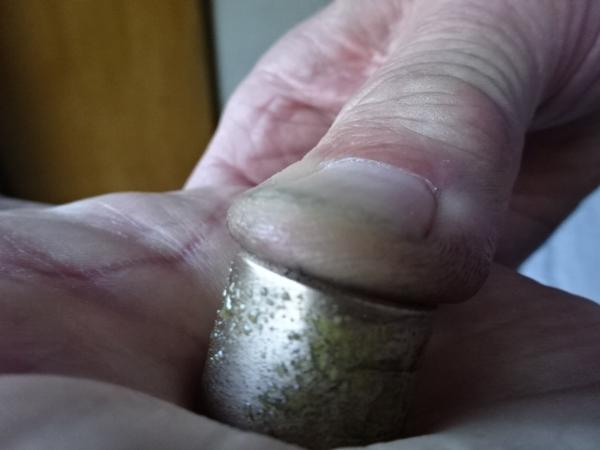
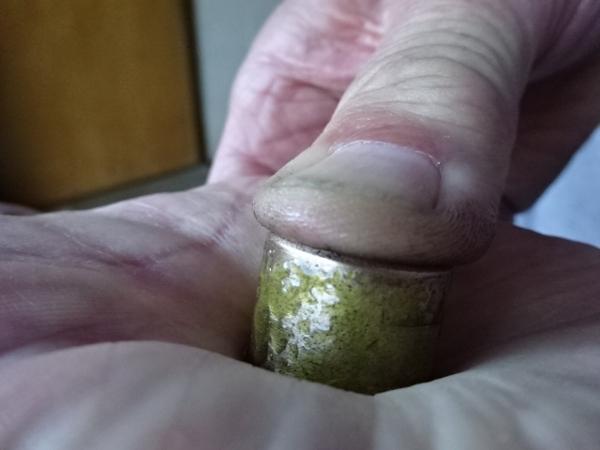
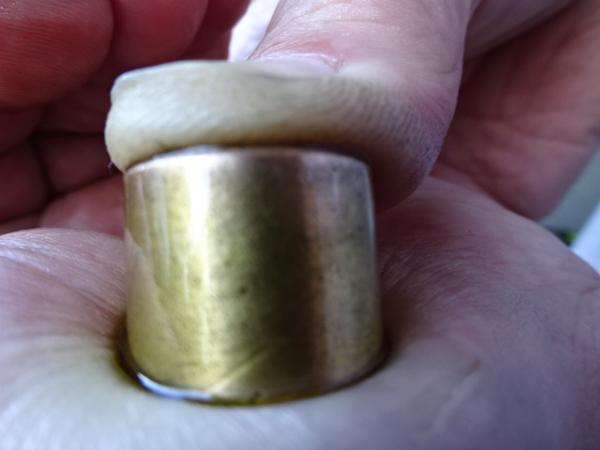
To pre-oil an Oilite bearing:
hold one hand fingers up and thumb out,
place bearing end up on your thumb (closing hole on bottom),
fill bearing with oil to the top,
place other thumb on top,
squeeze thumbs firmly together for several seconds.
The Oilite bearing is porous like a sponge. After several seconds of mild internal pressure you will see drops of oil forming on the outside like it was sweating. Instant oiling, and no need to soak it for 24 hours.

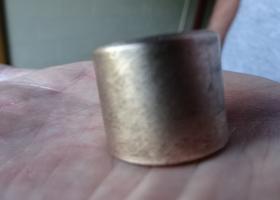
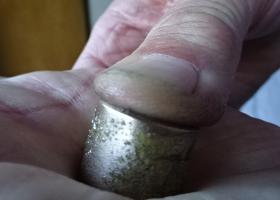
Bushing as receivedFilled with oil and pressure applied
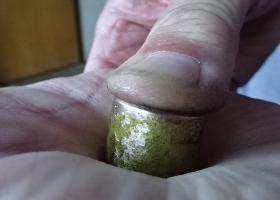
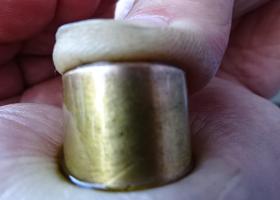
More oil soaked inFully lubed and ready to fit
(Photos compliments of William Revit in Tasmania)
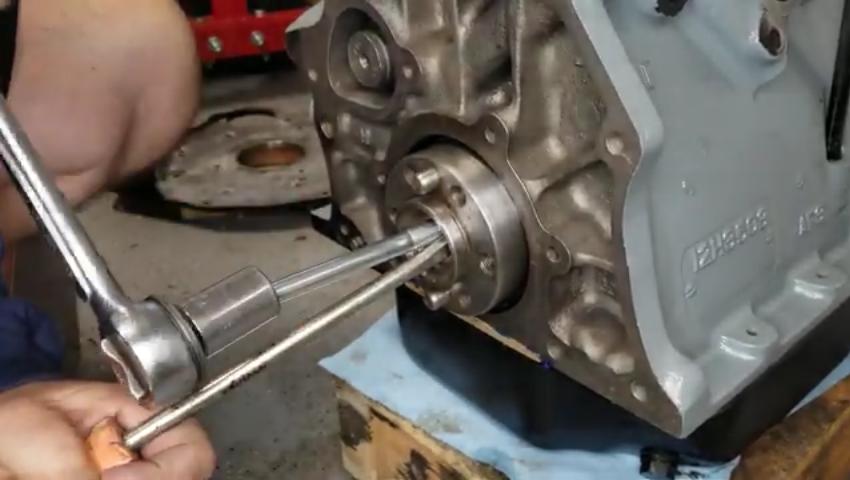
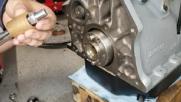
For installing the new bushing, ideally you would like to use a stepped punch with a polished pilot nose to fit the bushing (5/8 inch diameter for the MGA), a flat face shoulder to push on the end of the bushing, and outside diameter slightly smaller than the OD of the bushing (13/16 inch for the MGA). Tap the bushing into place until it hits the shoulder in the bore, withdraw the punch, and it should be ready to go as is.
The OD of the bushing is slightly oversize for a tight press fit, so installation will crush the bushing to a slightly smaller diameter. The ID of the bushing should be the right size to accommodate this reduction of diameter and end up with the correct finished bore size. If you use a pilot diameter on the punch exactly equal to the intended finished size (or a fraction of a thousandth larger) the bushing finished size will be good to go, but you may need a bit of force to extract the punch from the bushing.
If you do not have a piloted punch, a flat faced punch will work. Start the bushing straight and tap it into the bore of the crankshaft. Continue pressing it in until it hits the shoulder in the bore. For a punch you might use a wrench socket which is just slightly smaller than the OD of the bushing.
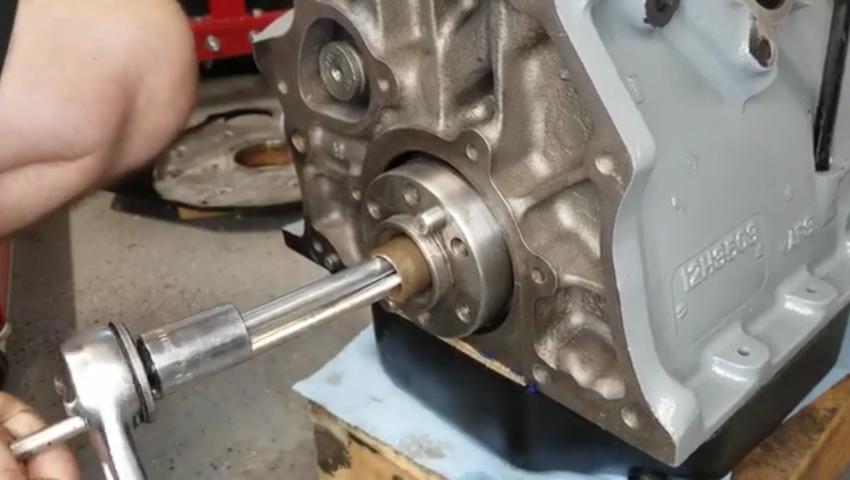
Once the bushing is in place you should DEFINITELY check the bore for proper clearance. If the finished bore is too small, or if you raise a burr on the end of the bushing during installation, the nose of the gearbox input shaft may seize in the bushing. In that case clutch release will not free the input shaft from the crankshaft, and you would not be able to shift into gear. Finished bore of the bushing should be exactly at the nominal diameter (0.625 inch for the MGA), as the nose of the gearbox input shaft will be slightly smaller to provide running clearance. If you can insert the gearbox input shaft and turn it easily with your finger tips, it's good to go. But if it binds it needs a little more work.
You can clean up the bushing bore by burnishing. Drive in a polished steel rod of the correct nominal diameter and pull it out again (possibly requiring some force for extraction). Check the bore again to be sure it will have running clearance with the gearbox input shaft. A plastic clutch alignment tool can give a quick check, but may not tell the whole truth, because the nose of the clutch alignment tool is slightly undersize. I may occasionally use an old rocker shaft for a quick check (nominal 5/8 inch diameter), but that too is slightly undersize and will not guarantee proper running clearance for the bushing. If all else fails you can run in a reamer to finish the bushing bore to exact nominal size. This is 0.6250 inch diameter, same as the bore for the rocker arm bushings.
|