The MGA With An Attitude
TIMING CHAIN TENSIONER Installation -- CS-103
CT-101 describes installation of the TIMING CHAIN TENSIONER. This is described in the Workshop Manual, but I thought the pictures would help to understand it better before your first encounter.
On 6/21/02, Rick Brown wrote:
>"I put a new timing chain, tensioner and camshaft plate on the engine - I now find that it is very hard to turn the engine at least a LOT harder than it was before. Is this normal or did I do something wrong?"
The factory manual fails to show the tensioner installed. The very early production MGA 1500 (first 158 engines only) had no timing chain tensioner. The factory manual illustration showing installation of the timing chain shows an early engine with no tensioner. The following page has an explosion drawing illustrating the tensioner. Several pages farther on it describes the function and servicing of the tensioner.
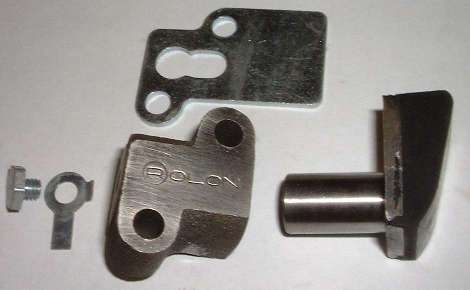
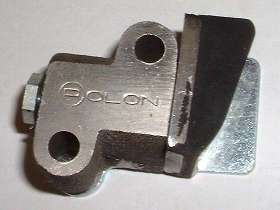
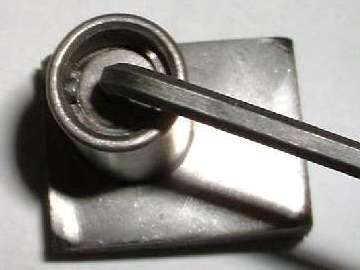
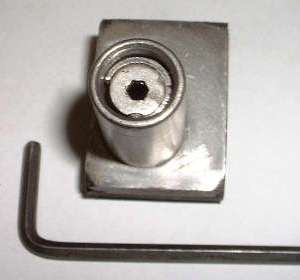 The tensioner has an anti-push-back mechanism consisting of a cylindrical cam inside and a small pin in the wall of the moving cylinder. During installation you need to remove a small threaded plug in the tail of the housing (opposite side from the rubbing block) and insert the appropriate size hex key. The original parts used a 1/8" hex key. A recent replacement part shown here would not accept a .125 hex key, but a 3mm key (.118") fit perfectly. SO much for quality of repro parts. Turn it to rotate the cylindrical cam inside clockwise to retract the rubbing block during installation. Then turn it to rotate a cylindrical cam inside anti-clockwise to release and extend the rubbing block after installation. Failure to do this can result in forceful interference between the rubbing block and the timing chain. Do remember to reinstall the plug after installation.
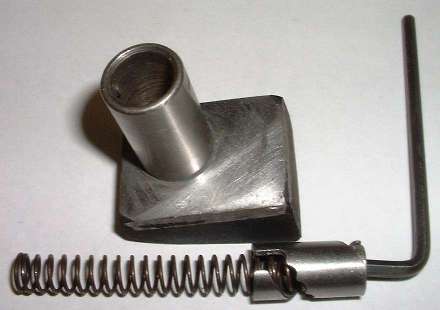
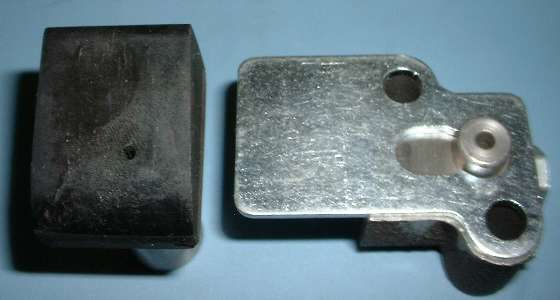
 When the engine is running, pressurized oil is fed into the tensioner to feed oil through a small hole in the rubbing block for lubrication of the rubbing face. As the escape hole in the rubbing block is substantially smaller then the oil supply hole in the base mount, the tensioner will also have some oil pressure inside to assist the the spring in keeping pressure on the timing chain. As the tensioner block moves forward the cylindrical cam inside rotates a bit to present a notched helical cam slot that prevents the rubbing block from backing off. This is particularly important when the engine is shut down and reverses rotation slightly from cylinder compression just as it stops. If the rubbing block gets too far forward during assembly it won't back up without some help from your friendly hex key.
>".... The two sprockets seem to line up correctly - without shims - there were none when I took them off."
During installation of the timing chain and sprockets you need to check/adjust the alignment of the sprockets.
Place a straight edge across the face of the sprockets. Hold a bright light on one side and sight through from the other side. If you can see a gap behind the straight edge at either sprocket you need to adjust the shims behind the crankshaft sprocket. There are usually two to four thin shims installed there, but it is possible that it could line up with no shims (rarely).
|