The MGA With An Attitude
FELT TIMING COVER SEAL Installation - CS-100
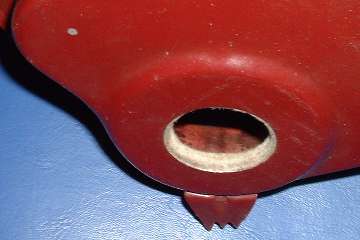
 Have you bruised your knuckles yet, trying to install the timing cover felt seal? The modern day replacement felt seals seem to be thicker than the original ones, so they are tougher to install. It does help to wet the felt with oil first. Pinch the felt with your fingers like making it thinner, and stuff it into the gland all the way around. You will have to buckle the felt ring back on itself just before stuffing the last bit into the gland. Once it's in place all around, use a wood stick or blunt screwdriver to stuff the felt as deeply as possible into the gland to leave as little as possible exposed.
Before installing the cover on the engine, put a little oil on the crankshaft pulley seal hub and press it into the new felt seal. As the felt piece will be a tight fit on the hub, this may take some axial force and a lot of twisting of the pulley to get them mated the first time. Give it a few more twists, then remove and reassemble the pulley with the cover a few more times until you are confident that it can be assembled with a simple straight push.
Clean the cover, apply a little "blue stuff" gasket goo on the cover and stick a new gasket in place, aligned with a few screws. You should not need any sealant on the other side of the gasket against the engine front plate. If you do glue both sides of the gasket it could cause trouble for next disassembly (without bending the cover flange).
Install the correct oil thrower to match the style of cover being used. Install the cover on the engine, leaving the bolts loose so the cover can float. Push the pulley into place, which will serve to center the seal and the cover. Tighten up a few of the exposed bolts to secure the cover in this correctly aligned position. Then remove the pulley to have access to tighten all of the cover bolts. Finally install the pulley with a proper lock tab and good torque on the crank nut.
See additional information on Timing Cover Seals and Oil Throwers.
|