The MGA With An Attitude
VALVE COVER TECH -- CH-107
GETTING THAT @#$%^&* VALVE COVER GASKET TO SEAL
This article describes a sure fire method to get your MG valve cover gasket to seat and seal properly. The primary concern is that the valve cover has to be flat along the bottom edge to make the gasket seal on the head.
Start by eyeballing along the edge of the cover, and if it is visibly out of plane you can lay it on a flat surface, use the end of a 2x4 board for a punch along the flange and pound it down with a BFH to get it close. Then glue the new gasket to the cover with Ultra Blue RTV, press it into place, install it temporarily on the engine to set the gasket in place and let the RTV dry for an hour.
Then set the cover with gasket on a very flat surface. A Formica covered counter top or laminated wood workbench might be flat enough, but you should check with a straight edge first. A heavy plate glass window like a sliding patio door should be flat enough, but you can't pound on that of course. Otherwise, if the intake manifold is not on the engine the top of the cylinder works well for the next step. Using a very thin thickness gauge, maybe .003", or a piece of thin shim stock, hold the cover tight against the flat surface and poke around under the edge of the gasket with the blade. Where the blade slips under you have a high spot and a gap.
Here you again use the end of a short piece of 2x4 board as a punch, lay it on the flange and whack it firmly with the BFH to bend the flange down a bit. The gasket will compress a little momentarily when you hit it, so the flange will bow a bit beyond straight and then spring back some. Then you check again with the blade to see if it's flat. With the gasket in there it takes a pretty good whack to give the flange a set, so it's not likely that you would overdo it. When you can't fit the blade under gasket anywhere you have it flat enough.
Then you apply a thin film of oil to the gasket to act as a release agent so it can be easily removed in the future. When you clamp it down with the two retaining nuts it will squash the gasket several thousandths of an inch to conform to the surface of the head, so no leaks possible. Later when you want to do a valve inspection or adjustment you just give the cover a little thump on the side with your fist and it lifts right off. With the original type cork gasket glued on top and oiled once on the bottom it will be good for several years and many inspection cycles. When you do need to replace the gasket it's easy to take the cover to the work bench to scrape the old gasket off, and you don't have much of a cleanup job on the cylinder head.
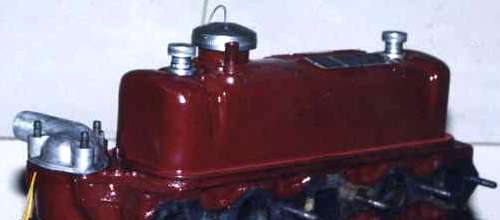
Keep in mind that the valve cover floats between the soft cork gasket and a pair of rubber grommets for sealing. It doesn't take much torque to squash the rubber bits. You do not want the steel cup washers to be in contact with the cover, or to bend the cover, or to break the small attachment studs. Five lb-ft of torque is enough here. You can tighten these with a nut driver. There are even various designs of aftermarket cover nuts being knurled knobs or having a short wing, intended to be tightened with fingers only (see photo above). If the cork gasket doesn't seal with light torque, it's because the cover bottom surface is not flat.
On 9/25/2012, Rob Edwards in Raleigh, NC, USA wrote:
"I checked the MGB service manual and the official MGB number is *four* lb-ft! I've just straightened my cover and will now stop overtightening my hold-downs".
|