The MGA With An Attitude
HEATER MOTOR TECH - ET-212 - Pg 6 of 7
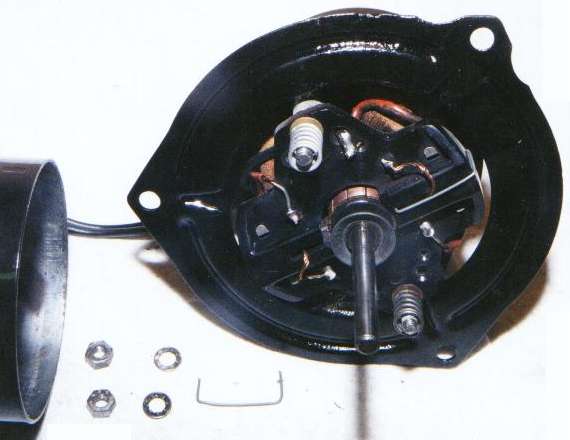
Here you see the motor mostly reassembled, all except for the front cover and the securing nuts. The brushes and springs are installed in the springs in the carrier plate. The rear shell is in place (just see the back edge) and the long bolts. You can see one of the tubular spacers behind the brush carrier plate (at top), and the flat washers and compression springs in front. At bottom center of this picture there is a small piece of bare steel wire formed like a staple. These I use to hold the carbon brushes in place during assembly. You can see the other "staple" in place as it is used just to the right of the commutator as it holds the brush in the retracted position. The brush on the left is extended against the commutator as it will be when the motor is running.
Now being sure that all of those shaft thrust washers are in the correct locations, just remove that last assembly staple, install the front cover and tighten the nuts, and whallah, a spiffy new heater motor ready for service! (See next page)
|