The MGA With An Attitude
FUEL SENDER UNIT Sealing -- FG-111
Addendum 4/1/2022:
Richard Juday in Longmont, Colorado, wants to add this friendly tip:
"After doing any messing around with the sender on the fuel tank?, FIRST THING YOU DO AFTER FILLING THE TANK is verify the solidity of your sealing. A leaking oil pan makes a mess on your garage floor, but fiddling around with this location can blow up your whole house". -- Richard
On 8/12/2011, Charles Givre in Baltimore, MD, wrote:
"The tank leaks from where the sending unit goes. I feel like I've tried every sealant known to man
 to get the thing to stop leaking, but nothing seems to work. Even worse, there have been moments when I've been able to get the gasket between the tank and the sending unit to stop leaking, only to have the gasket on the sending unit itself leak!! And naturally, I've gotten that to stop leaking, then I'll get a leak on the bottom where the screw comes out of the sending unit".
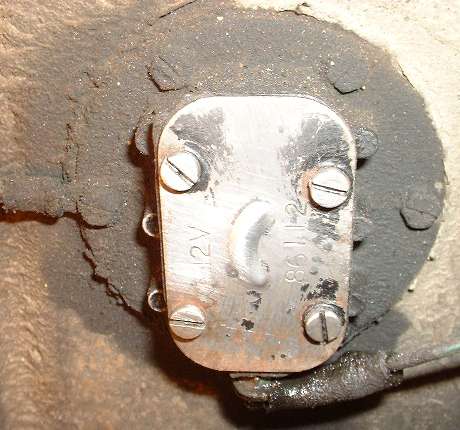
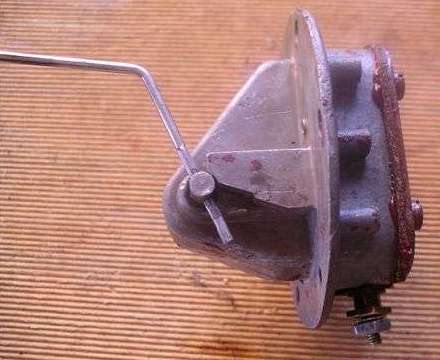
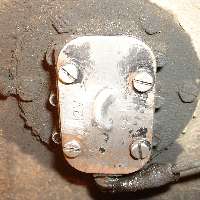
There are two gaskets for the sending unit, one between the tank the flange of the sender, and one behind the outer rectangular cover. Even when the gaskets do not leak out the sides, it is common that fuel may leak around the screws and seep out under the screw heads. I have good luck doing what the factory did originally, using cork gaskets with no sealant. In fact the Service Parts List even calls this piece "Gasket cork - tank attachment". If you can't get cork gaskets from the usual suppliers it is easy enough to make your own. Pick up a small sheet of cork gasket material from your local auto parts store.
Cut the tank gasket as a ring with OD matching the sender flange and ID matching the hole in the tank (to prevent gasket material from getting into the tank). Cut the outer gasket as a solid piece matching size of the cover (no matter if a touch of cork gets into the coil chamber). For the screw locations use a sharp pointed tool (ice pick) to punch small holes in the gasket.
 Force the screws through small holes so the gasket fits tight against the screw threads. When assembled the gasket will compress a bit and will be constricted to seal around the screws. For the outer cover the screws go into blind holes in the housing, so no chance fuel leaking around those threads.
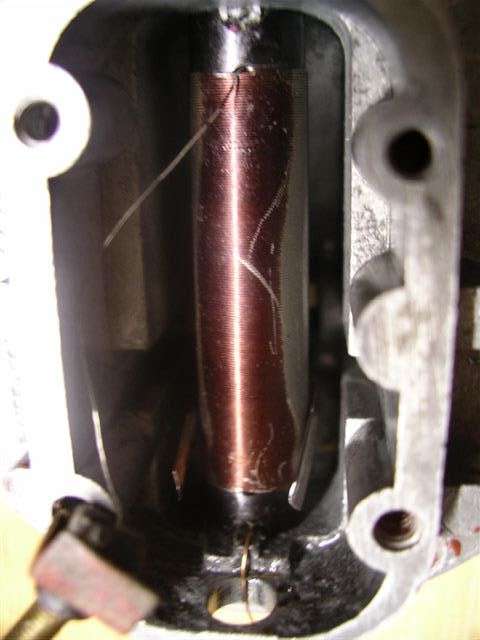
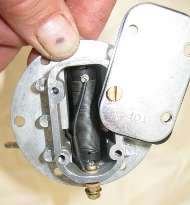
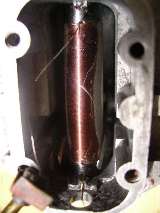
The bottom electrical contact stud should be mounted in a square fiber block inside the housing or a metal block with a stepped fiber washer underneath, with the fiber piece electrically insulating the stud from the housing. The signal wire from the coil must contact the stud but must not contact the housing. The wire connects to the stud, and the stud goes through the fiber piece. The first line of defense against leakage is for the fiber piece to seal on the stud and against the bottom of the housing. One trick there is if the wire is between the stud and the fiber block there may be a small leak around the wire. Underneath there is another fiber washer to electrically insulate a brass flat washer and nut from the housing. Below that should be two flat washers and another nut to attach the gauge signal wire to the stud. The bottom side fiber washer is supposed to be an insulator, not intended to serve as a fuel seal.
If the inside seal fails it will most likely leak through the threads on the stud. You may be able to seal it from the bottom without opening the cover by removing all of the bottom fasteners, applying a dab of fuel proof sealer around the stud, and reassembling it. Success here depends on quality of the sticky sealer substance. Current high recommendation is Hylomar® in a few different formula, or Permatex Hylomar which is the same stuff with the Permatex brand name on the package.
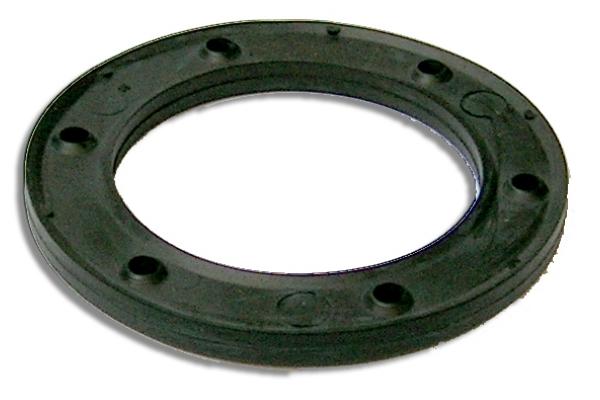
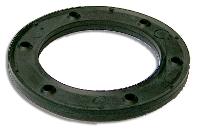 About the gasket for sender unit to tank joint: some vendors now supply a molded Viton gasket that is properly fuel resistant, thick and fairly soft with raised sealing ridges around the edges. The picture at right is from Peter Edney MG Parts in the UK, and I believe Moss Motors UK and USA have a similar part. These seem to seal as intended, except that fuel may seep out around the screws. This stems from the holes in the gasket being clearance holes, and fuel seeping around the screw threads. Moss USA recommends a set of nylon washers to install under the screw heads to seal the screws. This is a non-issue if you use a cork gasket with small holes that are interference fit with the screws.
Addendum October 10, 2018:
Joseph Baba in Fresno, CA, USA wote:
"I used the little plastic piece that sits on top of the ignition points. I used it as an outside insulator for the sending unit. It has a small shoulder and keeps the screw centered. On the inside, I used a leather seal, the one used on the oil pressure gauge copper line at the gauge (Moss Motos USA part number 435-516). I also used a slightly larger screw that could take a little more tightening".
|