The MGA With An Attitude
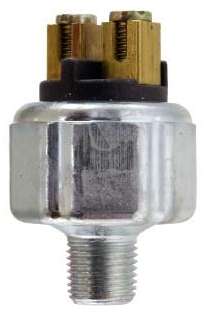
BRAKE LIGHT SWITCH - ET-119
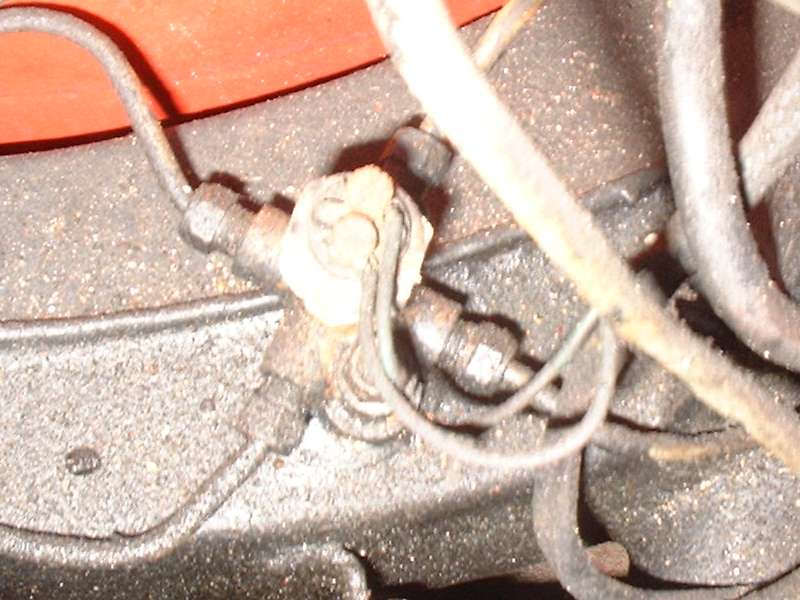
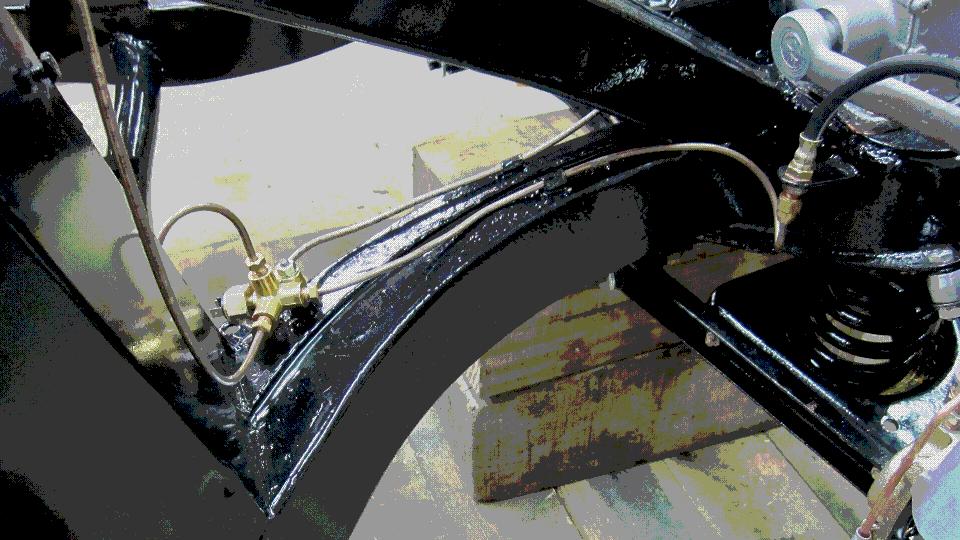
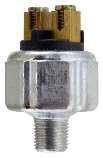
 The MGA uses a hydraulic pressure switch for the brake lights. This switch is located on top of the lower frame rail in the right side of the engine bay below the starter switch. It has a 1/8-NPT tapered pipe thread fitting and is screwed into the top of a 5-port brass connector block that also connects four steel brake pipes (see picture).
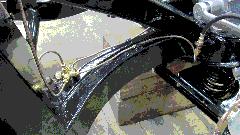 Note that the 5-way fitting is different for MGA Twin CAM and "Deluxe" cars. Here the tapered pipe thread for the pressure switch is on the side rather than on top. This will have a different part number for the 5-way fitting.
 The switch normally has two wires connected, Green for power input from the switched fuse, and Green with Purple stripe for signal output. For MGA 1500 the brake switch signal power goes to the turn signal relay unit. For MGA 1600 the brake switch signal power goes directly to the brake lights. The original style switch has set screw terminals. Slightly newer switches may have push-on spade terminals.
Replacement switches are made by some well known brand names, like Lucas, Bosch, Echlin. There will also be numerous off-brands that you may or may not recognize, some in plain white boxes bearing a retailer's number tag, and some made in the cheapest labor shops on the planet with questionable quality. Some recent issue switches have very cheap internal contacts that may work okay when new but degrade quickly to fail in short order. Major brand switches are usually okay, while some off-brands are commonly junk.
A common failure mode for the brake switch is for it to require excessive pedal force to make the electrical contact. This is unacceptable when the brake lights may not light up at all with moderate braking action. You should be able to press the brake pedal with two fingers and make the brake lights light up. It is far less likely for the switch to stick in the "on" condition (almost never). If the switch remains on after actuation, check first that the brake hydraulic system is not holding some residual pressure. If you can open a brake bleed nipple, and the brake lights go off, that's a hydraulic problem, not a bad brake switch.
Brake lights work only with ignition on. If they don't light up when you step on the brake pedal, try shorting across the brake switch terminals with a paper clip or a key. If that makes the brake lights work, then you have a bad brake switch. If not, then you need more electrical diagnostic work.
Grab a test light, ground the clip wire, and probe the brake switch terminals. With key on the green wire terminal should have power. If not, then follow the green wire back toward the power source. The prior connection is a snap connector in the harness near the starter switch (just above the brake switch). Try wiggling the wires here to see of you can restore a good connection. Otherwise the connection before that is a green wire on the fuse block where you may find a blown fuse or a dirty fuse clip.
When you do have power on the Green wire at the brake switch, then pressing the brake pedal should make the connection to have power on the brake switch output terminal. If not, then you have a bad switch. For the MGA 1500 model the Green/Purple wire goes through a snap connector near the starter switch, then on to terminal 5 on the turn signal relay. For the MGA 1600 model the Green/Purple wire goes to a 3-way snap connector at rear of the car, aft of the RR splash panel.
To remove the brake switch you can disconnect the wires, then use a larger socket wrench to unscrew it from the 5-way block. Beware that the pipe connector block is attached to the frame with a single bolt. Wrenching on a stubborn brake switch could rotate the connector block and damage some brake pipes. If the switch does not unscrew easily, then find a way to hold the 5-way block so it cannot turn while you unscrew the switch.
The brake switch has a tapered pipe thread. When installing a new switch you can wrap the male thread with Teflon tape to make a good seal on the thread without over tightening the fitting. If you have the new switch taped up and ready to install, you can remove the old one and install the new one immediately without losing brake fluid, in which case you may not need to bleed the brakes afterward.
|