The MGA With An Attitude
WIPER WHEEL BOX Maintenance - ET-113A
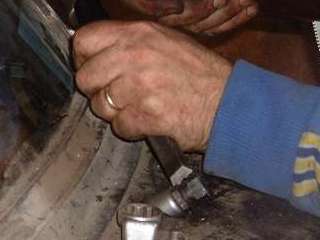
Before removing the wiper wheel boxes, this is a casual reminder to review the prior article on R&R of the wiper motor. If you only need to replace a wheel box, or want to remove them for clean and lube, this is possible to do without removing the wiper motor. If you remove the bottom cover from the wheel box, the tubing and drive cable can be disconnected leaving the wheel box assembly free standing. But you may want to remove the top bezel nut first, while the drive is still connected to prevent the spindle housing from rotating.
 Beware that a bezel nut which has been secure in its station in life for many years may not readily give up its position. The wheel box is a relatively expensive assembly, and the nut is downright cheap by comparison, so if it doesn't come loose with first encouragement, don't ruin the wheel box by tearing the threads apart. It is better to use a sharp chisel to (gently) split the nut for removal and save the male threads.
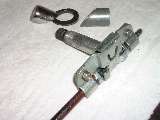
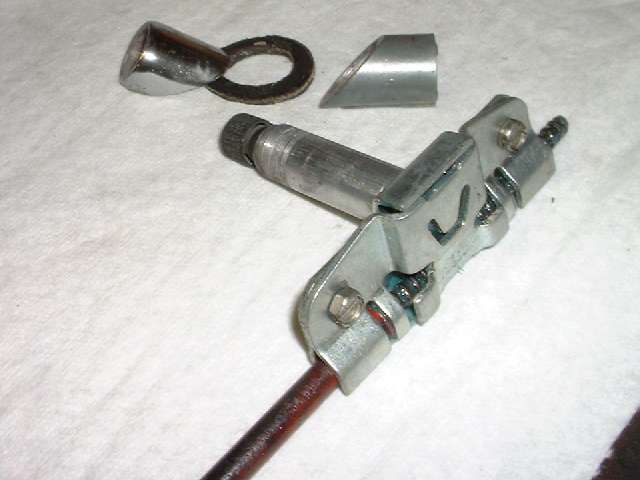
The picture here shows the wheel box removed with the tube and cable drive connected. In operation there should always be a tube installed on both sides of the wheel box to guide the cable and to protect the otherwise exposed cable end.
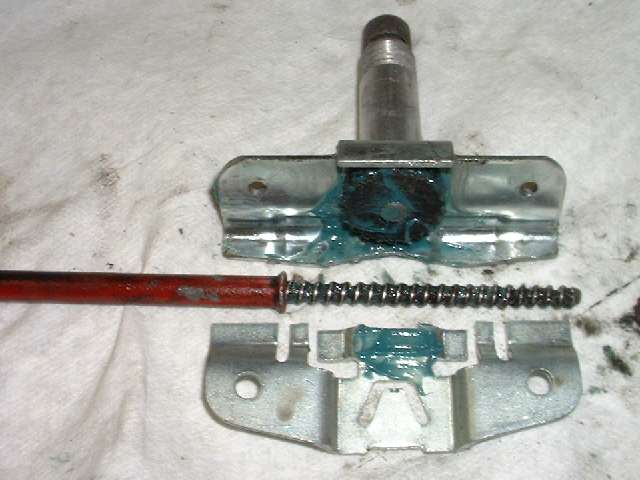
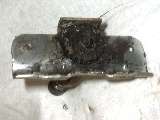 When you open the wheel box you are likely to encounter dried grease and a sticky spindle. The dried grease may be removed with your favorite solvent and a stiff bristle brush. A few drops of penetrating oil applied to the base of the spindle (behind the wheel) may help the spindle to turn freely (maybe). Resist the first urge to apply penetrating oil at the top end of the spindle. The top end of the housing is "supposed" to be sealed with a rubber ring around the spindle. If this seal is still in good condition, the oil may not enter here anyway. Additionally a dose of penetrating oil may cause deterioration of the seal. So better to apply solvent and/or oil at the bottom, and if that does the trick, stop there. If the seal appears to be badly deteriorated, or the spindle wobbles in the housing or does not turn freely, you might consider replacing the wheel box to avoid future problems.
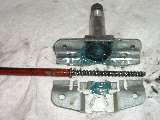 Apply a few drops of oil to the bottom end of the spindle (behind the wheel). Hold the part with wheel up and nose down, and rotate the spindle to distribute the oil, hopefully getting a little oil to run down inside the spindle housing. Re-lube the wheel and the surrounding areas of the metal shell where the drive cable will come into contact using your favorite grease. Standard grease gun grease or wheel bearing grease works well. Silicone grease may last longer without drying out, if you happen to have the stuff handy. Clean the drive cable and the bore of the tubing. Check to be sure the tubing will slide easily on the cable. Remove any existing kinks or replace a damaged tube if necessary. Re-lube the cable for the full length, and reassemble the whole works.
Addendum February 24, 2018:
One more note for final assembly. The flare on the tubing should be captured securely in the slot in the wheelbox cover plate (see photos above). Torque on the wheel results in push/pull reaction on both the cable and the outer tubing. If the tubing flare is not captured in the slot, the tubing can slide back and forth end wise resulting in reduced travel of the wiper arm (and clicking noises).
Addendum March 4, 2018:
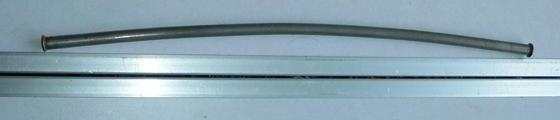
Length of the center tube between the wheelboxes is important to get the flared ends of the tube properly engaged in the slots of the wheel box brackets. If you need to make a replacement part, you might flare one end of the tube, then form the curve in the pipe before cutting to length and forming the other end.
M Dollimore in Wiltshire, UK reports:
"The length of tube after flaring is 348mm (13-11/16-in). The degree of bend referencing the straight edge, offset at the centre is 15mm (19/32-in)".
Addendum March 14, 2022:
Having fought for a few decades with the center drive casing being too long, I finally bit the bullet and shortened it from 13-5/8 inches to 12-3/4 inches. Very happy to report that it now fits and works perfectly. See follow-up article ET-113W.
Find additional informatoin on length and form of the cable drive outer casing tubes:
14G3722,
AHH5410,
AHH5411
|