The MGA With An Attitude
HORN PARTS, Optional Extra - ET-109C
For MGA the right side low note horn was standard, while the left side high note horn was optional extra. The standard wiring harness has two wires with bullet connectors that connect inside the dome cover of the horn. When converting from single horn to dual horns, you will need the high note horn with left side bracket and associated fasteners. You will also need the optional horn wiring harness and two twin tube snap connectors (which may have been included with the original factory sub-harness).
Diagram from MGA 1500 SPL above.
Diagram from MGA 1600 SPL below.

|
Electrical diagrams shown here are from the MG Series MGA Workshop Manual. The 1500 and 1600 model diagrams are functionally identical.
To connect wiring for dual horns, start by removing the dome cover from the original low note horn, disconnect the two wires inside, and pull them out through the rubber grommet. Then install a twin tube snap connector on each of the original wires to serve as circuit splitters. Into these connectors plug in the four wires of the optional sub-harness, finishing with three wires of same color in each connector.
The optional extra harness has four wires and (originally) a cloth overwrap. The wires are two each Brown/Black and Brown/Green (NB and NG), and (I believe) 16 AWG, carrying current for only one horn in each wire (one size larger than general harness wiring). The new wires will have bullet connectors on both ends. There are two short wires (about 15-in long) to connect the original right side horn, and two longer wires (about 31-in long) to connect the optional left side horn. Since the original sub-harness is under one part number, I presume it will be a single harness containing all four wires. The four wires would be even at one end with the two shorter wires breaking out just a short distance along the harness. (An aftermarket or dealer installed conversion harness may be sheathed with vinyl, and may be made as two separate 2-wire harnesses).
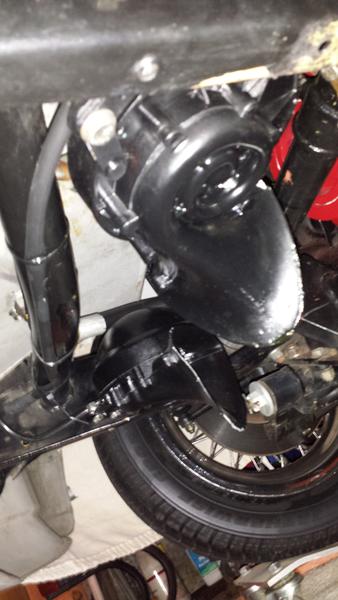
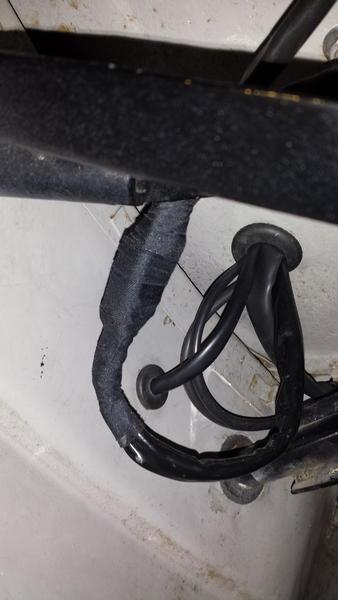
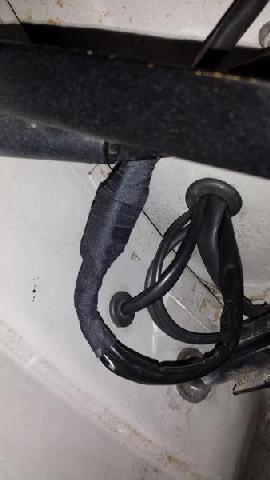
The original horns are not polarity sensitive, so it doesn't matter which wire goes to which internal terminal. Be sure to use a rubber grommet where the wires pass through the dome cover before re=installing the cover. Cable to the left side horn should follow the round cross tube in the front frame extension. There should be two (additional) straps to secure the optional harness to the frame extension (tie wraps work as well). The optional left side horn mounts same as the right side horn, except mirror image with left handed bracket. When installing the optional high note horn the following parts will be required.
Optional extras:
(1)  1B9008   Horn - high note
(1)  AAA2107  Bracket - horn (left side)
(2)  HZS0505  Screw - horn bracket to LH front extension
(2)  FNZ105   Nut - screw
(2)  LWZ205   Washer - spring - nut
(2)  HZS0407  Screw - horn to bracket
(2)  FNZ104   Nut - screw
(2)  LWZ204   Washer - spring - nut
(1)  ADG1517  Grommet - Horn (maybe also replace the original one)
(1)  AHH5453  Harness - horn
(2*) 2H2617   Connector - snap - 2-way
(2)  AHH5506 Strap - horn harness
* The two twin-tube snap connectors may have been originally supplied with the sub-harness, as they are not listed separately in the Service Parts List.

|