The MGA With An Attitude
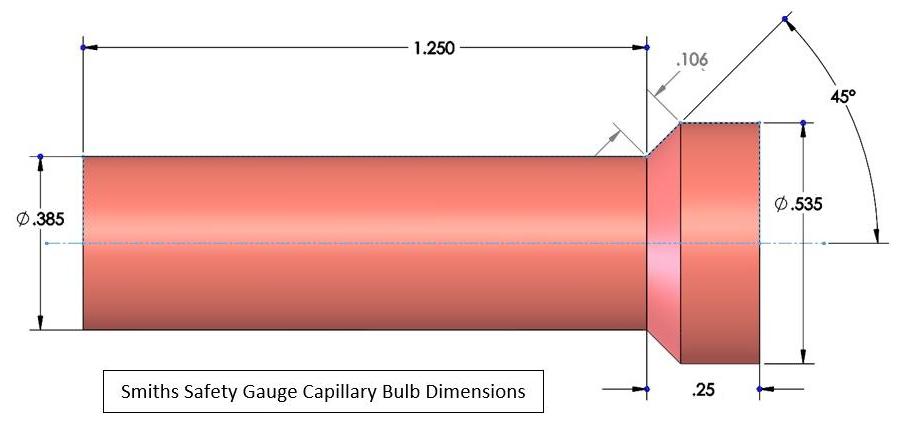
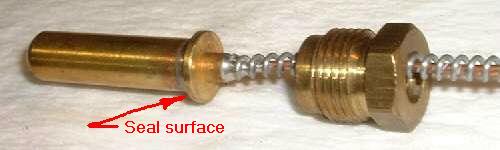
TEMPERATURE SENDER Nut And Bulb Flange Incorrect -- DT-102E
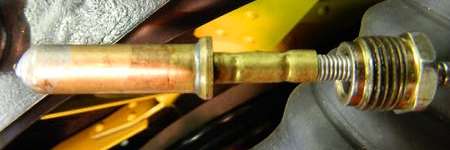
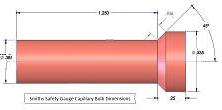
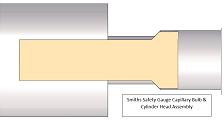
 Aftermarket probe and nut above. --- Correct dimensions below, Aftermarket probe and nut above. --- Correct dimensions below,
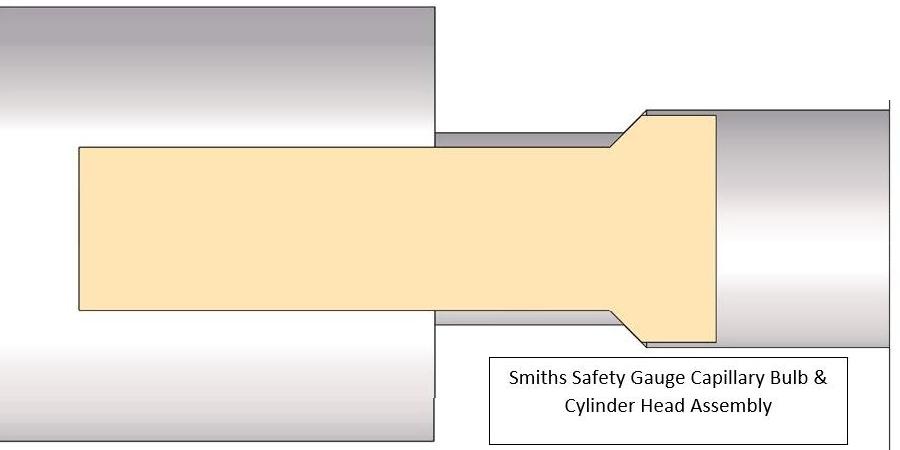
The picture below shows an original temperature probe with a repaired part. On the repaired unit the bulb sealing flange is thinner, and the retaining nut is shorter. The nut runs out of threads (on one end or the other) and binds before the bulb can be sealed to the cylinder head. Refer to article FT-061 for details of the Faulty Parts report.
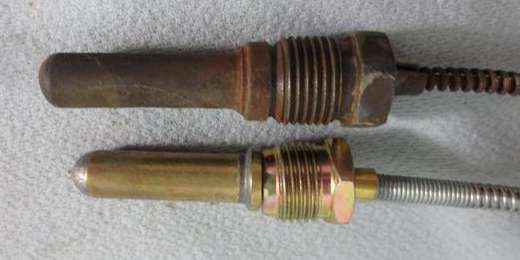
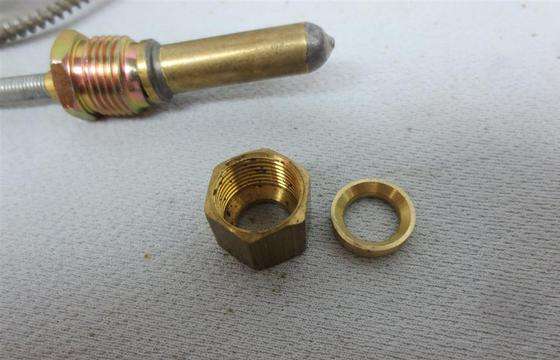
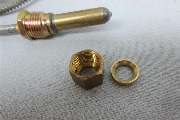
Original and repaired parts for comparison.
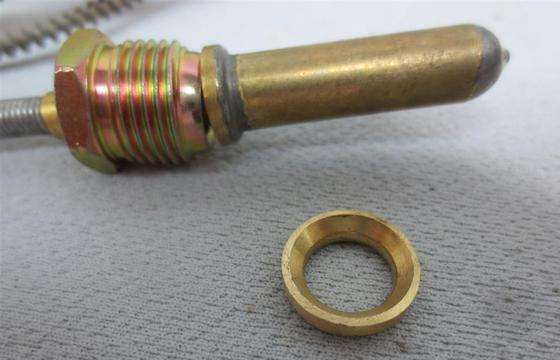
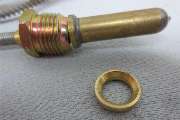
Repaired parts from a different vendor.
The second picture shows a similar bulb with thin flange, but the nut is longer. The nut also has an extended pilot diameter on the nose end and an undercut to root diameter of the threads immediately under the hex head. This nut could screw in until the hex head would hit the flat on the cylinder head. The pilot diameter on the nut is as small as the shoulder on the bulb, so it can push the bulb down to seat firmly even when the flange is thinner than depth of the counterbore in the head. This one works okay.
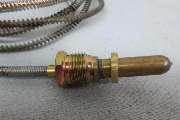
This picture shows another bulb with thin flange and a different strain relief collet. The tube nut has extended pilot nose and undercut thread similar to the prior photo. This demonstrates dome of the variations that may be found on replacement parts.
So the issue is not so much differences of the bulb design, but the retaining nut on the first repaired part at top of page is not suitable configuration to retain the modified bulb. The faulty unit should be returned to the vendor, but if you don't want to send it back there are a couple of ideas on how to make it functional.
My first suggestion is to install a flat washer between the nut and the bulb flange. The washer OD should be same as diameter of the bulb flange, the ID should clear the nipple on back end of the bulb, and thickness should be sufficient to push the bulb flange tightly down to the sealing shoulder in the cylinder head. The washer will need a saw cut in one side wide enough to slip over the thinnest part of spiral shield. You may need more than one flat washer to make up the required thickness.
Gary Starr in northern Illinois, USA writes:
"I had the same problem with mine. I took a copper washer from the brakes, cut a piece out of it, placed it between the bulb and nut, and crimped it down so it fits the hole and acts as a shim between the two".
Garon Curtis in Fair Oaks, California, USA wrote:
"When I rebuilt my temperature gauge, the bulb that I cut from the modern temperature gauge was a bit smaller. To make a spacer washer I cut the end off of a brass plumbing flare nut, then grinding off the flat hex sides to make it round. The inside of the flare nut has the same bevel as the seating side of the probe and the hole was the same as the probes diameter".
Keith Arndt ultimately decided to "fix" his faulty assembly rather than send it back for rework. He wrote:
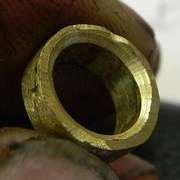
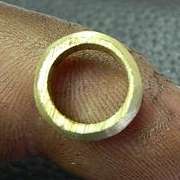
 "I don't want to spend another 10 days of down-time by shipping the whole unit back to the instrument guy. I made a bushing to fit between the bottom of the bulb flange and the machined surface inside the head. Dimensions are 5.5mm thick, 9.9mm hole diameter, concave on one end and convex on the other. It looks kind of crude, but I think it'll get it done (and I only burned my fingers a couple of times). "I don't want to spend another 10 days of down-time by shipping the whole unit back to the instrument guy. I made a bushing to fit between the bottom of the bulb flange and the machined surface inside the head. Dimensions are 5.5mm thick, 9.9mm hole diameter, concave on one end and convex on the other. It looks kind of crude, but I think it'll get it done (and I only burned my fingers a couple of times).
"I started with a brass exhaust flange nut and ground it down to thickness with an abrasive stone on the drill press. I then drilled out the middle threads to fit the barrel of the probe. Next I used a 1/2" bit to make the concave surface followed by the bench grinder to knock off the outer hex corners. Finally, I ground a convex shape with the bench grinder on the other end to mate with the machined head surface. The whole thing took about half an hour.
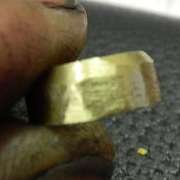
"My only concern is that it may be nearly impossible to remove once I get it tightened. I'll try a little anti-seize to go with it. And just for luck I'll do what Gary suggested and throw a couple of turns of Teflon around the ferrule and bulb flange".
I would like to strongly suggest that anyone encountering this problem should send the instrument back to the repair shop for reconciliation. When customers accept this sort of shoddy work, the vendors have no incentive to change their ways (or may not even know the problem exists), and future customers may also spend hours trying to "fix" the vendor's bodge. If all faulty parts were send back for rework the vendor should ultimately get the message and supply good parts. At the very lease we should contact the vendors to inform them of the problems (and perhaps a possible cure if you have figured it out).
|