The MGA With An Attitude
|
| MGAguru.com |
|
MGAguru.com |
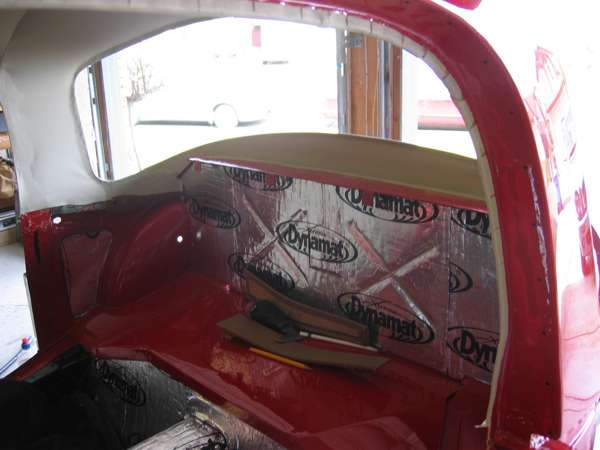
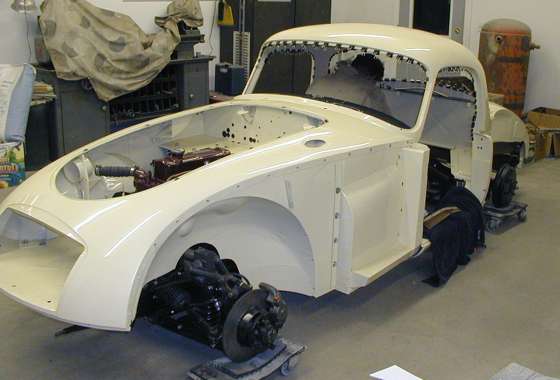
HEADLINER INSTALLATION, MGA Coupe - CP-104
On 07 December 2007, Gerard Hutchinson in St. Louis wrote:
"What type/brand of adhesive should be used? Once the bows are inserted into the headliner and attached properly to the interior, what direction do you begin attaching -- front to back; back to front; side to side? What size office clip is strong enough to withstand all the pulling and stretching? Is it possible/recommended to stretch the entire headliner out before using adhesive?"
On 08 December 2007, John Progess in Utah, USA, wrote:
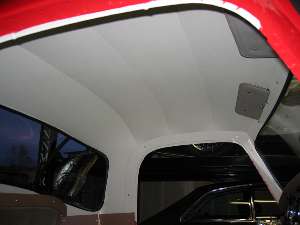
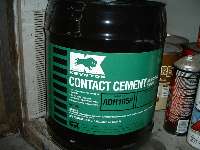
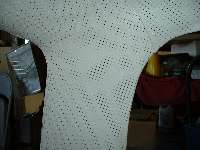
"I used those black spring steel paper clips. I had a bag of them and used them about every 2" to clamp the headliner while gluing. I used Weldwood contact cement and it is still holding 5 years later. I did a trial fit up with the clamps before gluing. I started with the sides first then went to the front and back. In the photo you can see all the clamps.
Using lots of paper clamps. - (Photo compliments of John Progess)
On 08 December 2007, John DeWolf in Canada added this:
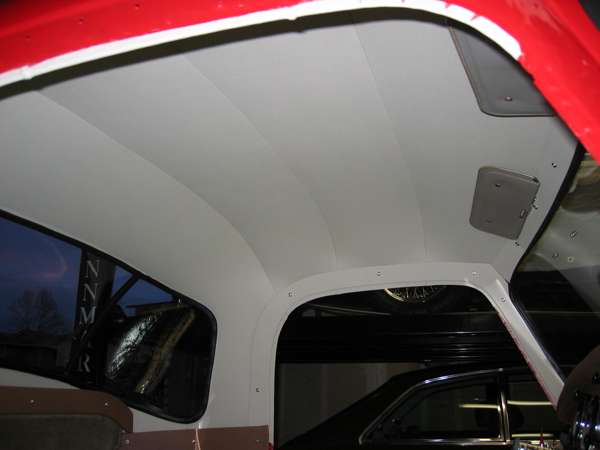
"The Workshop Manual deals with the coupe headliner in Section S.16, mostly about removing it and the usual 'reassembly is a reversal of the dismantling procedure'. It adds 'When re-sticking the head liner to the roof with rubber cement work from the rear to the front and from the center to the sides'. Do a trial fit with the clamps starting along the centerline and work to the sides. When it is correctly positioned release the back around the rear window, while leaving all the other clamps in place. Apply the adhesive to both body metal and fabric and adhere the headliner in the normal manner of working with contact adhesives, starting in the center and working to the outer edges. Then do the same at the windshield and finally the door surrounds. I trimmed the fabric at the opening after it was all in place and didn't wrap it around the flange.
"Before you start take a look around the rear window area for a number, I can't remember exactly where it is. Someone was interested in these numbers a few years ago. I believe they were factory work numbers for the coupe tops".
On 09 December 2007, John Progess wrote:
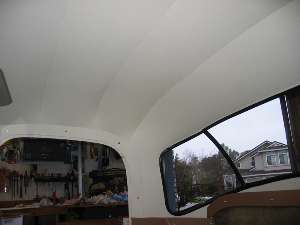
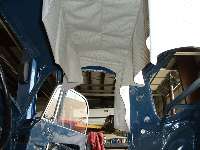
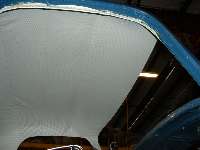
"Yes you overlap the headliner over the flange and glue the headliner to the outside of the flange. Using nylon string in the windshield seal to lift the seal over the body flange while pushing the windshield from the outside there was no damage to the headliner. It is definitely a two man job".
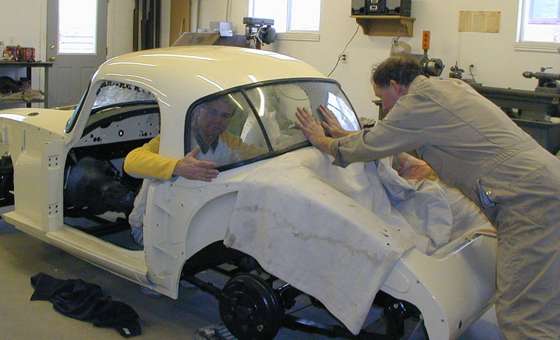
Installing the backlite. - (Photo compliments of John Progess)
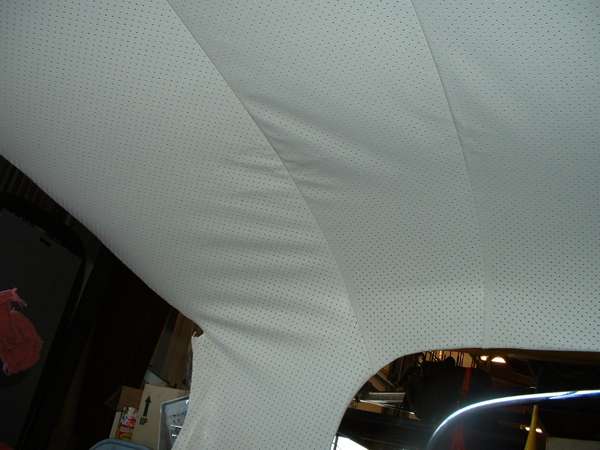
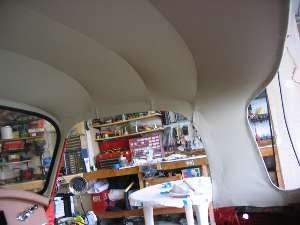
One tip from the "Ratty" restoration was to make sure that the bows are polished so that the headliner material slides easily on them. This helps to retain an even tension. The head lining bows are all different lengths. The shortest goes to the front and the longest to the rear.
On 20 April 2009, Scott Shirk in Texas wrote:
"My question concerns the strip that goes around the door opening and chrome door trim/drip rail. How does it go in and does it go in before or after the main headliner? Is the main headliner attached around the door opening like around the front and rear glass or is it loose and just held in place by the covered trim pieces"?
On 21 April 2009, Andy Preston in California wrote:
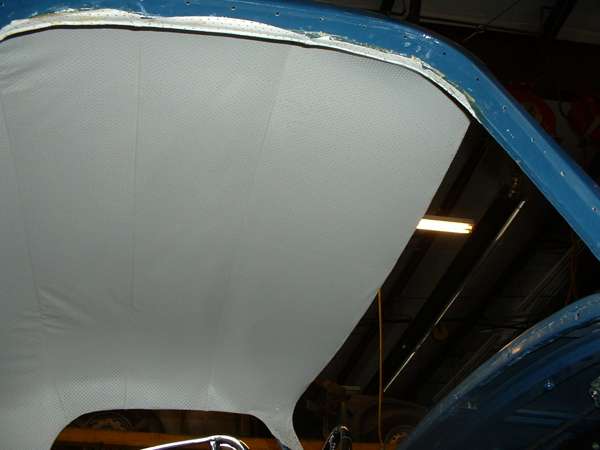
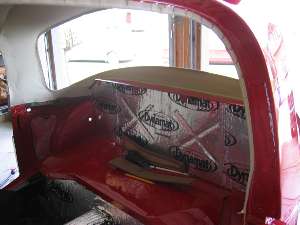
"The headliner folded over the front and back window lips and also folds over the upper door openings. The stainless steel upper door trim goes on last and the material does not go under the trim (although I have seen some that have and I don't like it). The door seal (pinch weld) goes over the edge of the door and covers the headline material that folds over the door lip".
The following photos are compliments of Andy Preston.
At 07:06 PM 2/4/2019, Mark Wellard in Australia wrote:
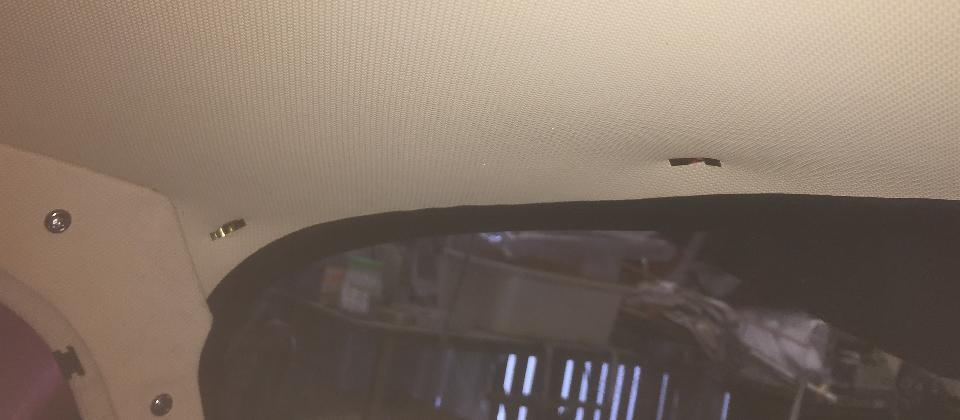
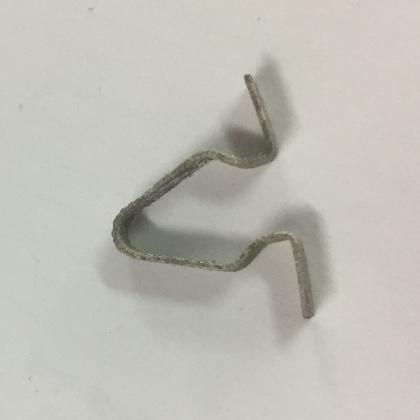
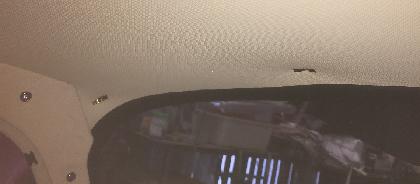
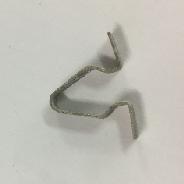
"There are 5 spring clips that push into holes (~3/8") and provide additional tension above the windscreen. You can also see one of the several spring u-clips that were used around the doorway to ensure the headlining was fixed. They were spaced about 4" apart. I have not found either of these clips referred to the in the SPL but they are visible on original cars, as well as mine".
More photos and notes from R J Brown in Colorado, USA:
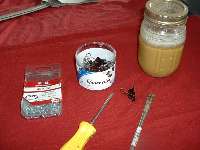
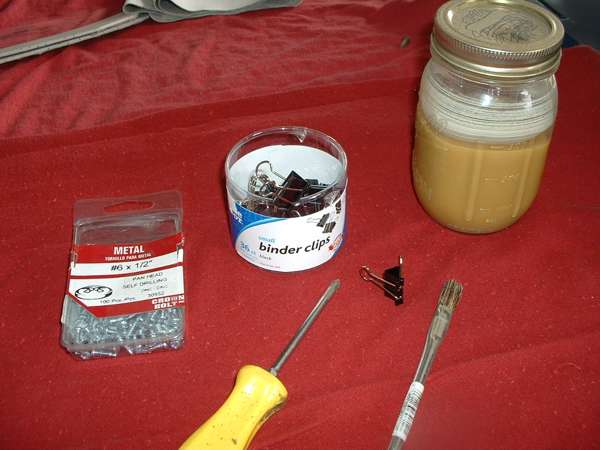
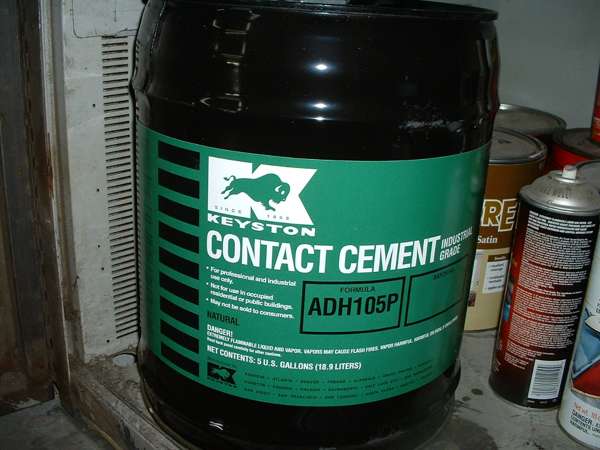
 The glue I am using, pictured here, came from a friend who owns a car upholstery shop. When I ask him what to use he gave me some. The next picture shows, the screws used to attach the bows, the bottle of glue, the binder clips I use (100-120 needed), and a flux brush to paint on the glue. The glue I am using, pictured here, came from a friend who owns a car upholstery shop. When I ask him what to use he gave me some. The next picture shows, the screws used to attach the bows, the bottle of glue, the binder clips I use (100-120 needed), and a flux brush to paint on the glue.
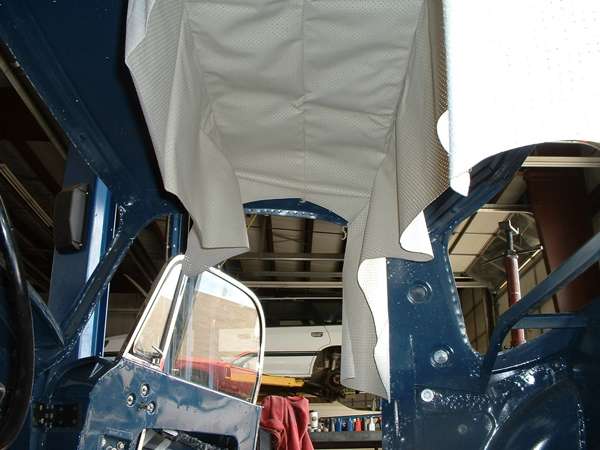
Here is the headliner loose with only the bows attached.
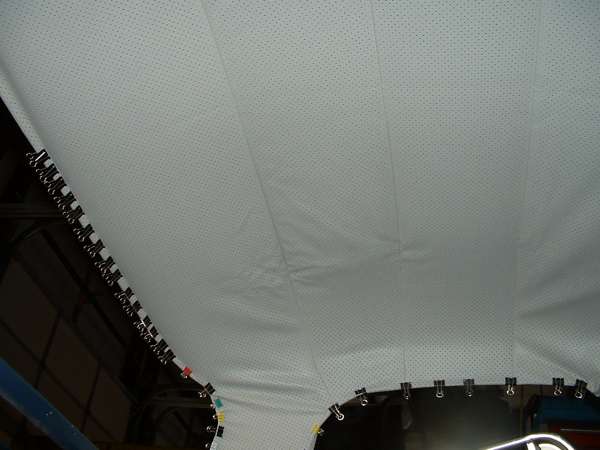
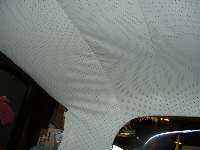
Now you go around the edge of the headliner and gently stretch it and hold it with the clips. The headliner will have LOTS of wrinkles, That's OK. Be patient. Stretch a little. Tug a little. Move around the clips. IGNORE, WAIT, leave outside in the sun to heat it up. Over the next few days a little at a time you tug re clip trim (carefully) until it is perfect. The area in the rear corners where the long flaps drop will be the hardest to do. BE PATIENT. If you have a heat gun and are very, very careful the process can be speeded up.
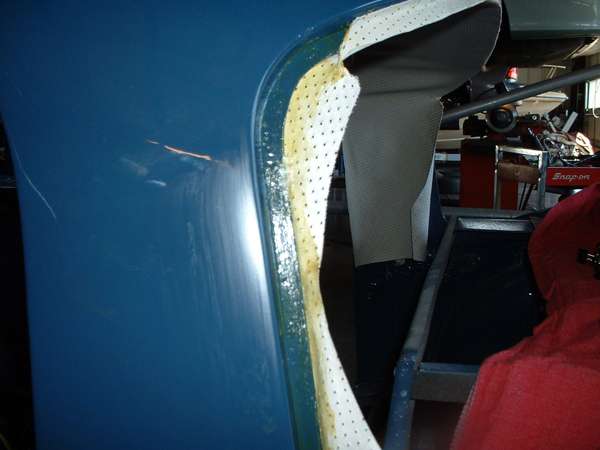
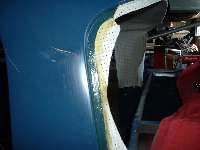
The front and rear have been glued. Sorry no pictures. Just paint the glue on both the metal and the headliner and let dry completely. Because you already trimmed the headliner and fit it with the clips all you do now is fold it over onto the glue in an even manner. I left the corners unglued until last. When you do the sides the front corner flap gets glued to the pillar. The rear corners are the hardest to do. This picture is of the left rear pillar glued on the front but not the rear.
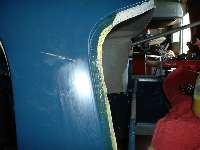
This picture shows the glue applied to both sides in the left rear corner.
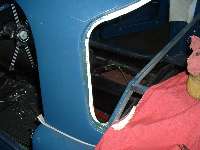
Glued and trimmed but not put down in LR corner. Same corner Done.
 Same corner inside shot. Compare with the wrinkled shot earlier.
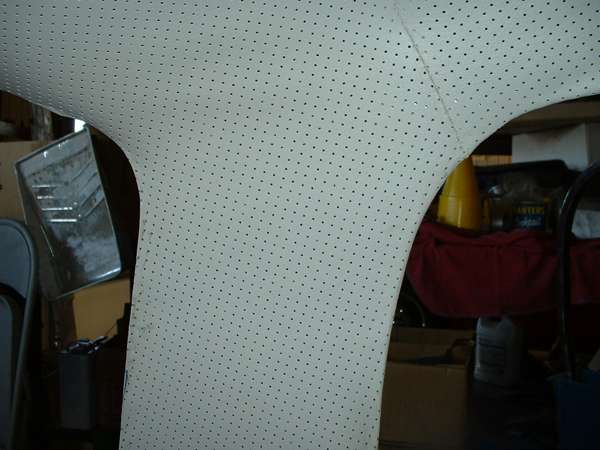
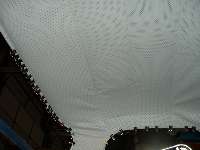
Done. The wrinkles that remain should come out on there own or with a heat gun prior to window installation.
Optional sun visor cover material should be same material as used for the headliner. This is originally off white (cream, beige, or very light tan). I have reports from end users that the much touted headliner from Scarborough Faire is white (incorrect color).
Addendum, September 17, 2014:
On 9/17/2014, Matthew Kelleher in Berkeley, CA, wrote:
"Having just ordered (Aug 2014) a headliner for my coupe I can definitely state that the Moss headliner (white) is the incorrect color but the Scarborough Faire headliner (Creme) is the correct color".
Take this with a grain of salt, as the colors may change from time to time. Always ask before you buy.
|