The MGA With An Attitude
FRONT BODY SHROUD Replacement -- BD-202A
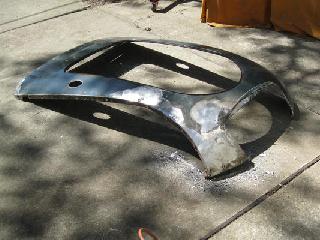
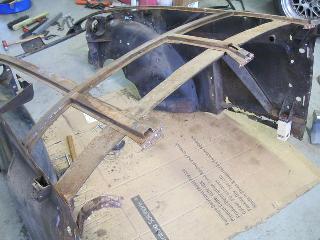
If the MGA front body shroud might be bashed or badly rusted and beyond salvage, you may need to remove this piece for replacement. Some people may otherwise remove it for access during replacement of the front air pan or heater shelf and firewall parts. This is not so difficult to remove, but quite time consuming since you have to break a lot of spot welds. Also modern replacement parts are notorious for bad shape requiring lots of fettling to make it fit, so you might consider repairing the one on the car rather then trying to install a new one. Or if you don't mind removing two of them, you might take a good original shroud from a donor car. That said, we can get down to the replacement process.
On Jan 21, 2019, Kevin Bruce in North Richmond, NSW, Australia wrote:
"I removed my shroud so I could repair the firewall, quite a lot of damage, and the radiator duct
 panel. To make it easier, once you drill out the spot welds on the back of each of the top hat reinforcements (at the back of the shroud above where the instrument panel goes), bend them down so they clear the shroud. You don't need to remove them or cut the front dash pad mounting. You need to drill out the spot welds on the side of the shroud around the wing/guard/fender on each side. You don't need to drill out the welds for the firewall. I needed to for my repairs and it wasn't that hard. You need to remove the spot welds in the bonnet/hood channel. And then you're ready for the front.
"In my case when it came time to refit the shroud its pretty straightforward to ensure that it lines up with all of the old drilled out welds. With another shroud, it's not quite as easy but still pretty straightforward. Drilling out spot welds, there are lots of ways and its not too difficult. Obviously the less damage you do the better. If you can see the spot weld (not so easy on old well rusted metal) center punch it and start drill it with a 3/16 drill. You don't need to go all of the way through. Don't sweat it if you do. Then use a spot weld drill to drill out the bulk of the weld. These can be specially ground drills or a mini hole saw type tool. You know you have gone far enough when you see rust since this means you are through the first layer of metal. Again its not the end of the world if you go right through. A MIG welder will fix it! Inevitably some of the weld will get missed. Use a small chisel to finish it off and separate the panels rather than going nuts with the drill. If you can't quite see exactly where the spot weld is because of rust etc., hit it with a wire brush and then some metal prep/Deoxidine (Phosphoric acid). It will then be visible.


 "Once it is time to assemble the new shroud, I'd ensure any holes caused by drilling out the spot welds underneath on the top hat sections and wheel arches are MIGed up and ground off since they won't necessarily line up with the holes in your new shroud. I'd make sure everything has a coat of primer and then put the bits together. You can use the spot weld drill to clean up the metal on the panel beneath prior to plug welding. I even do this with weld through primer since it never seems to weld all that well well in spite of the name. To grind off the plug welds in the bonnet channel section takes a little care. A 10 mm (1/2 in) belt sander makes this a bit easier. Once it's all together I use 2-pac seam sealant to seal all the lap joins. Its got Zylene Phosphate in it and supposedly uses capillary action to help get into the lap join. My form of snake oil I guess!


"The ducts below the grill badge vents are spot welded to the structure under the shroud. All you have to do is drill out 2 pop rivets which hold them to the shroud. The bulkhead/firewall can either be replaced with the one from your parts car (if it is sound) or you can remove your present one and attach it to the replacement shroud. Pretty easy to remove and refit. Just some more drilling out of spot welds. Make sure that the four bonnet hinge captive nuts are still OK. Once the shroud is welded back on you wont be able to get at them in spite of what some people have said. You could also plug weld your existing body number tag onto the replacement bulkhead".
|